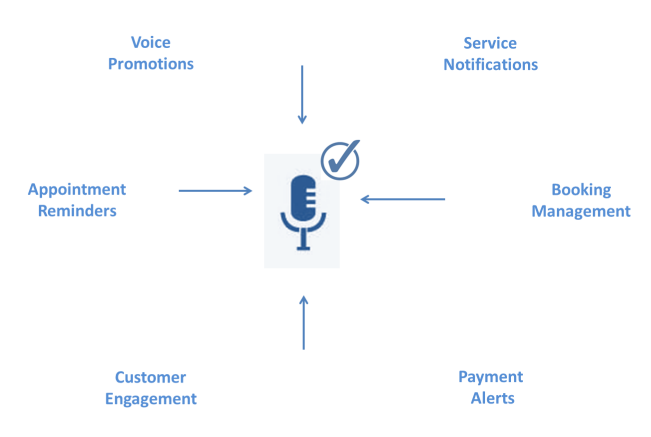
Use Voice Messaging IVR for :
Prerequisites
Please make sure you have necessary licenses for Voice Messaging & Inbound.
This solution may also require certain provisioning set-up so please contact your account executive and confirm if the setup is ready to be utilized.
Visit Getting Started with Voice Messaging for more information on Voice Messaging.
Setup IVR
Note that in the following steps, we will discuss the same example that we depicted in the flow of Voice Messaging IVR. Simon is our end-user who has a PIN pending transaction.
You may customize your setup based on your requirements to generate unique IVR flows. Setting Up IVR for your enterprises is a two step process:
* Users must have basic understanding of Call Control Objects before proceeding further. Click here to learn more.
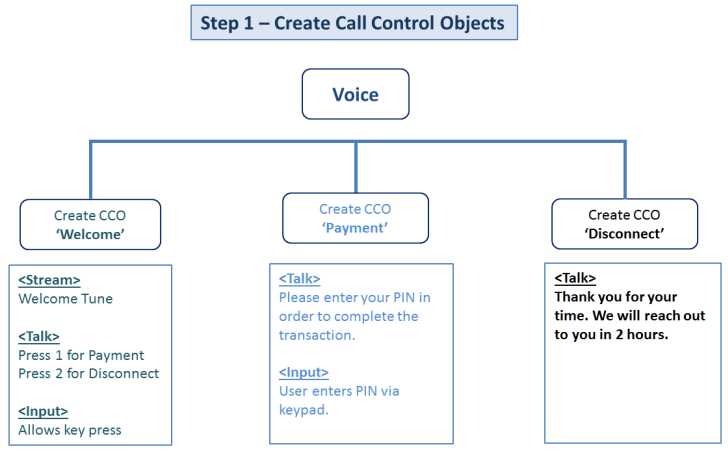
We will create three different CCO's using Voice Messaging for our example. We've shown a pictorial representation of steps we are about to follow:
1) Call Control Object Welcome
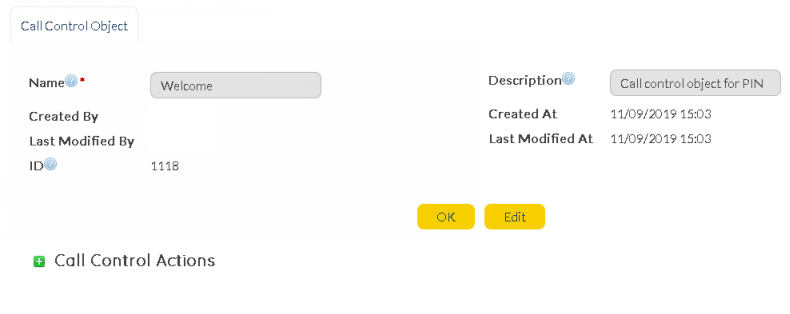
a) Create Call Control Object 'Welcome'.
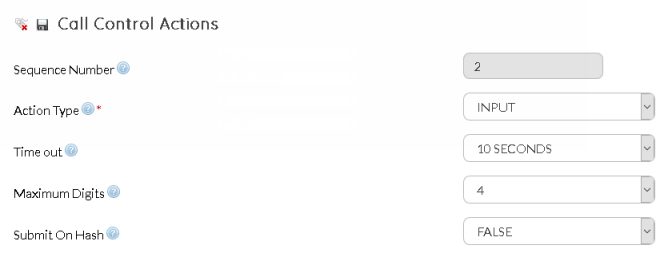
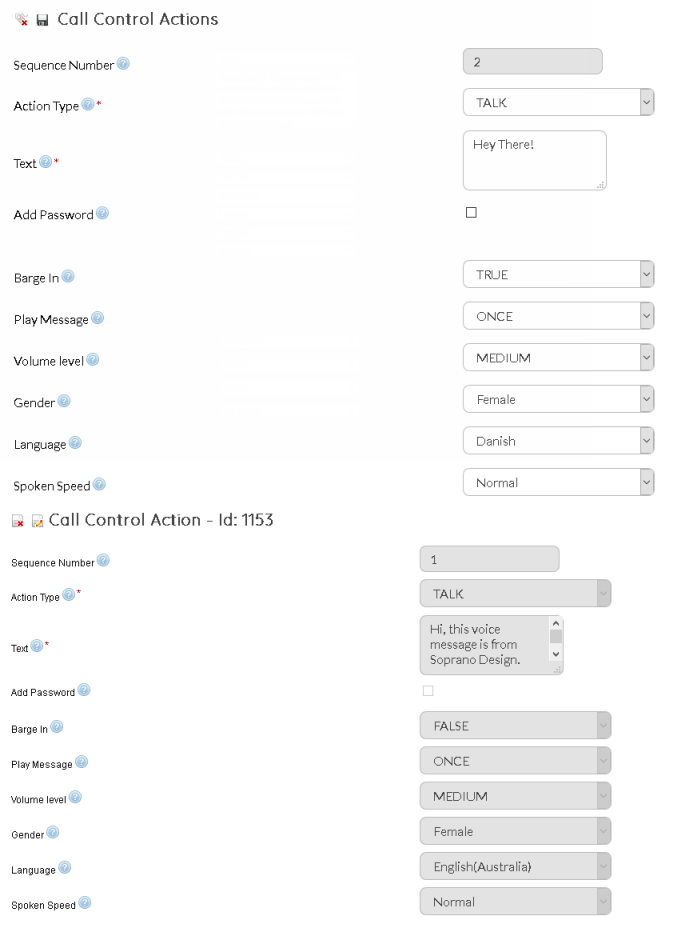
b) Add three Call Control Actions - Stream, Talk & Input, in the same order. Select Stream and upload an audio file with welcome tune. Followed by Stream, select Talk and enter the text that needs to be converted to speech. Input must be selected as the last Call Control Action to provide key press input option to Simon. Below is how the Call Control Action screen would look like:
c) When invoked, Call Control Object 'Welcome' will play a audio tune followed by above message as text-to-speech, allowing Simon to provide key-press inputs at the end.
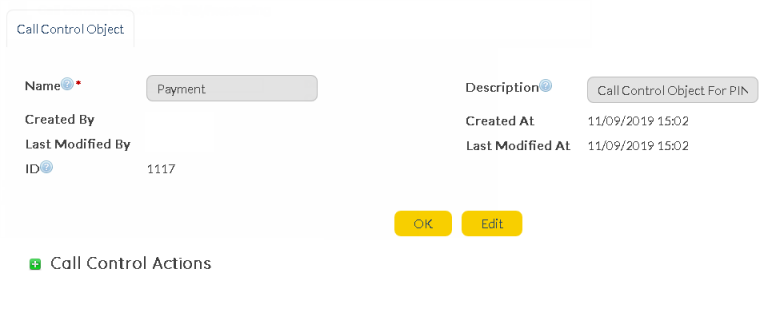
2) Call Control Object 'Payment'
a) Let's create the second Call Control Object 'Payment'. This call control object is created with the purpose of sending voice message with payment options for Simon.
b) Add two Call Control Actions - Talk & Input, in the same order. Select Talk and enter the text that needs to be converted to speech. We will enter - " Please enter your 4 digit PIN followed by hash sign". Select Input as the last Call Control Action to provide key press input option to Simon. Below is how the Call Control Action screen would look like:
c) When invoked, Call Control Object 'Payment' will play the text message asking Simon to enter the PIN, allowing him to provide key-press inputs.
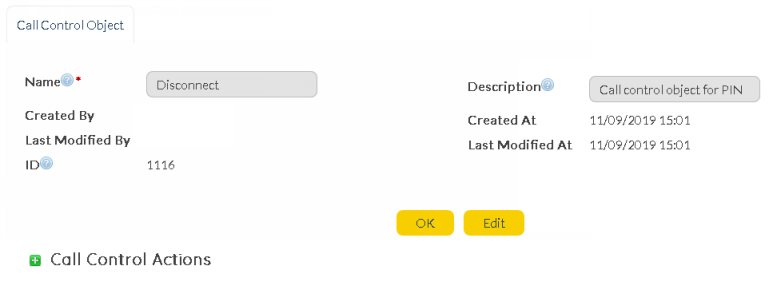
3) Call Control Object 'Disconnect'
a) Let's create the third Call Control Object "Disconnect". This call control object is created with the purpose of a sending a voice message to Simon before disconnecting the call. Note that this flow has not been presented in the IVR Call Flow example and may be considered as additional user-experience step.
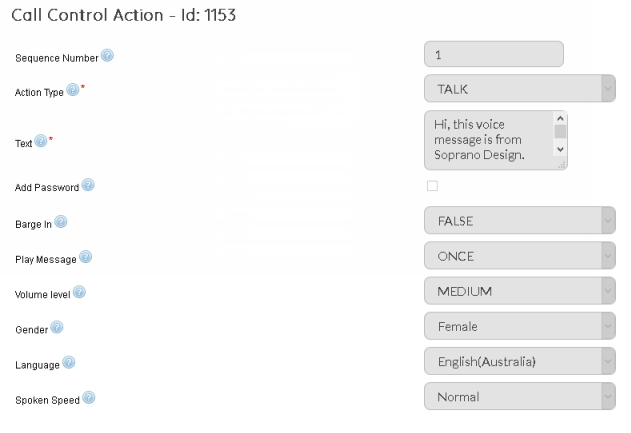
b) Add one Call Control Actions - Talk. Select Talk and enter the text for voice message - " Thank you for your time. We will reach out to you after 24 hours.". Below is how the Call Control Action screen would look like:
c) When invoked, Call Control Object 'Disconnect' will play the above voice message.
Need more help on steps to create Call Control Object ? Click here.
Once Call Control Objects are set-up, move on to creating an Inbound order to complete the IVR setup.
|

•Create Inbound Orders & Link to Predefined Call Control Object
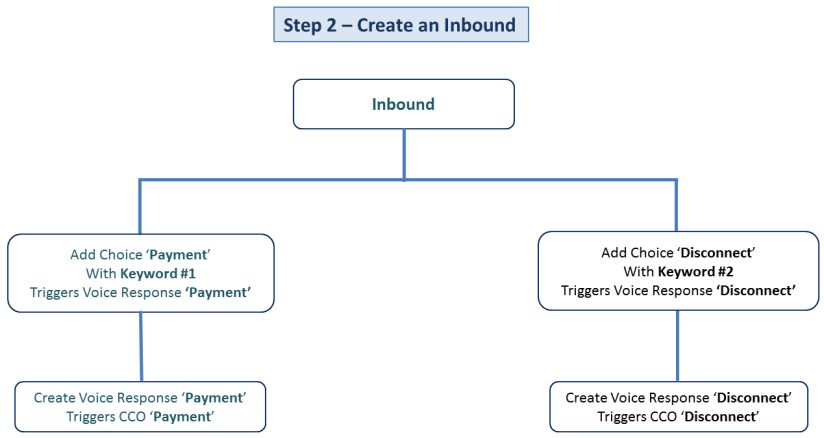
Now next step for setting up IVR is creating an Inbound campaign utilising the Call Control Objects we just created. Let's name it 'PIN Processing'. Below is the glimpse of Inbound order we are about to create:
* Users must have basic understanding of GSMS Inbound and Voice Access Numbers available for the user-account before proceeding further. Click here to learn more.
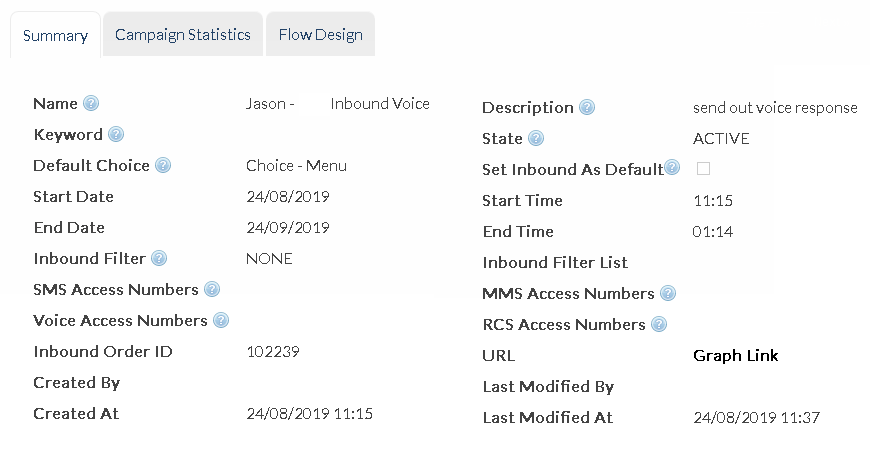
1. Create an Inbound Order 'PIN Processing' :
2. An Inbound order consists of two important entities - Choice & Response. Inbound Choices are defined with a keyword and if keywords are hit based on user's responses, Inbound Responses linked to the choice are triggered. We will define 'Voice Message' Responses that means, when a keyword with specific Choice will be hit, a voice response will be triggered.
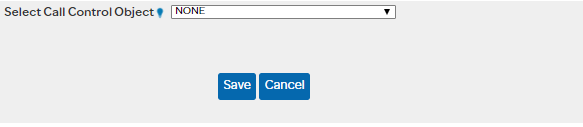
a) Voice Response 'Payment' - Follow steps explained in Inbound - New Inbound Response Message(s) for filling in Summary, Destination, Triggers and Delivery Options. Content tab is most important aspect in setting up Voice Response for IVR flows. Under Content tab, select 'Provision Content' option and the following screen appears:
Let's select 'Payment' from the Select CCO dropdown for this Voice Response.
b) Voice Response 'Disconnect' - Follow same set of steps as explained in 2.a and under Content tab, select Disconnect from the Call Control Object dropdown.
3. Now we have created an Inbound order, two voice responses - Payment & Disconnect. Let's add following Inbound Choices:
a) Choice 'Payment' - Choice 'Payment' must trigger Voice Response 'Payment' (Triggers tab) and must have keyword as '1'. b) Choice 'Disconnect' - Choice 'Disconnect' must trigger Voice Response 'Disconnect' (Triggers tab) and must have keyword '2'.
Steps for creating choices are explained Inbound - New Inbound Choice(s).
You are all set to generate IVR call experience using AT&T Voice Messaging and Inbound.
|