* Click on the step to expand.
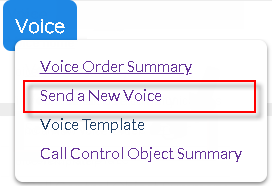
Step 1 - Open a New Voice Order
•Login to the AT&T GSMS web portal using valid credentials.
•Select 'Voice' tab from the menu options in AT&T GSMS and click Send a New Voice Order to open the 'New Voice Service Order' screen.
|
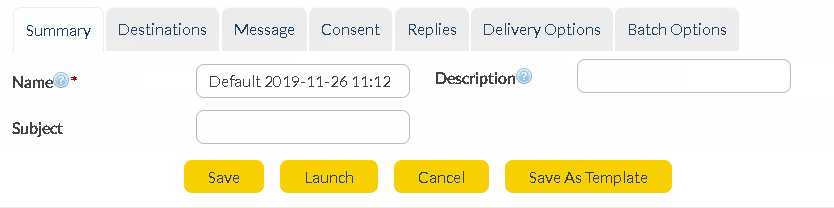
Step 2 - Fill in Voice order details under Summary tab
•You will be taken to the below page:
•Enter the name, description and subject for the voice order:
|
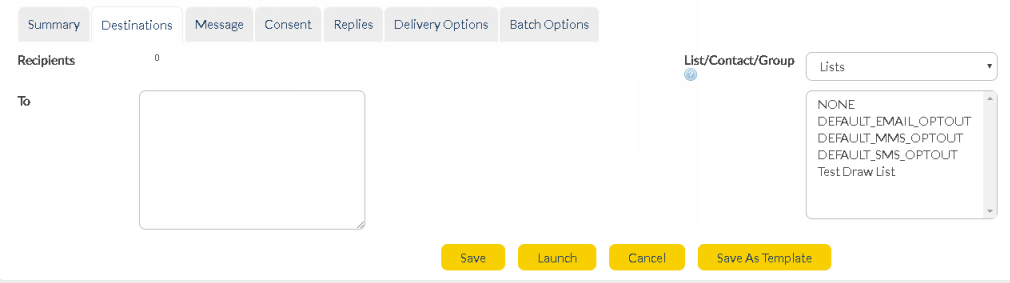
Step 3 - Select Recipients under Destination tab
|
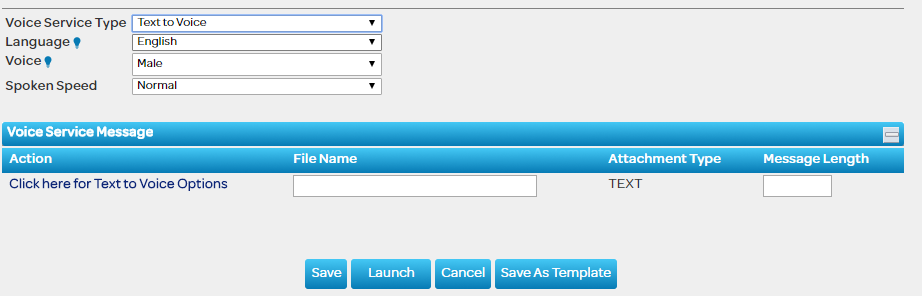
Step 3 - Send Text-to-Voice order through Message tab
1. Select Voice Service Type - Voice Service Type which is nothing but the method by which you will send your actual message playback content. AT&T GSMS provides three options as Voice service type:
•Text to Voice •Voice with Attachment •Call Control Object (CCO)
In order to send a voice order using Text-to-Voice method, select Text to Voice as Voice Service Type. Text-to-Voice allows you to upload a .txt file which will be converted to a voice content.
2. Add language, speed, voice gender - Once you select Text-to-Voice from the drop-down, below fields appear on the screen:
3. Text-to-Voice Options - Once you click on "Click here for Text to Voice Options, below screen appears on the window with options:
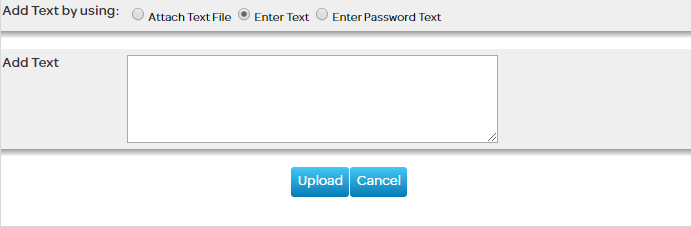
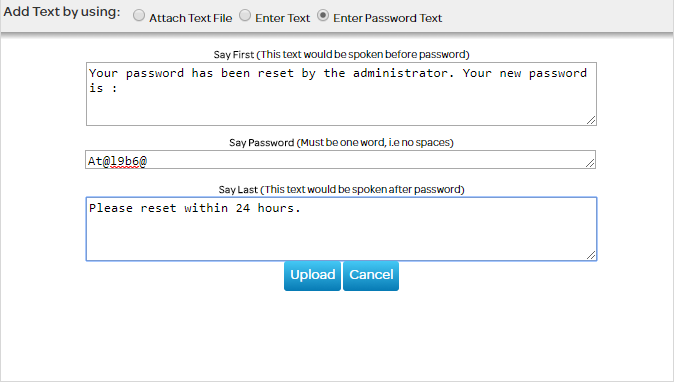
•Attach Text File •Enter Text •Enter Password Text
a) Attach Text File - If you select 'Attach Text File', you need to upload a 'txt' file using by clicking on 'Choose File' button.
b) Enter Text - If you select 'Enter Text', option to 'Add Text' appears. Enter the text that you would want to convert to voice.
c) Enter Password Text - Used in case of OTP or passwords where the user wishes to have the letters spoken individually and also highlighting the letter-case. GSMS also provides the flexibility to add a text before and after the password is spoken aloud.
4. Upload - Click on 'Upload' button once you fill in all the fields. Click 'Cancel' to discard all the changes. You are almost set! Move on to the next step.
|

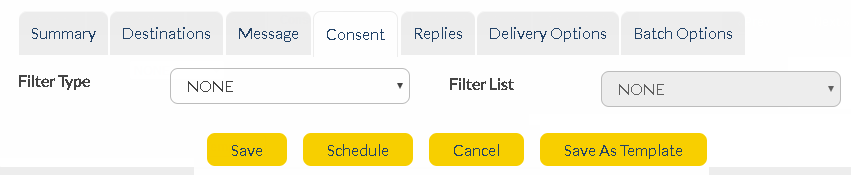
Step 4 - Filter Recipients using Consent tab
Filter Type - The type of filter (Blacklist/Whitelist) to apply to the outbound contacts/list.
•None - No outbound permission filters in place. •Blacklist - No messages will be sent to the people listed in the blacklist. •Whitelist - Messages will only be sent to people listed in the whitelist.
Filter List - Name of the list that is used as a blacklist/whitelist. The lists are filtered to only present 'TEXT' type Lists and not 'UPLOAD' or 'AUTOMATIC'.
|
Step 5 - Manage responses of Voice order through Replies tab
Reply To Address Type - Select from the drop-down menu for each message type. If a recipient replies to your message, this is the method by which it will be received. A copy of every message is stored and details can be viewed in Messages section of AT&T GSMS (i.e. INBOX).
Reply to Address - Type/paste the reply email address, phone number, URL or Inbound name for each message type. If 'INBOX' is your Reply to Address Type, this field is not required (replies will go straight into the messages inbox within AT&T GSMS.
|

Step 6 - Set up your Delivery Options
|

Step 7 - Send Voice Order in Batches via Batch Options
This feature allows you to control the rate at which messages are delivered. You may want some messages delivered at the same time, and others may need to be staggered. For example, if your message contains a prompt to call a phone number, you may want to stagger delivery so that your phone system is not overloaded with calls.
|
