* Click on the step to expand.
Step 1 - Open a New Voice Order
•Login to the AT&T GSMS web portal using valid credentials.
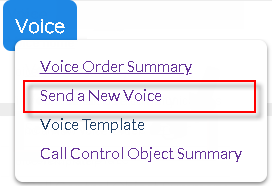
•Select 'Voice' tab from the menu options in AT&T GSMS and click Send a New Voice Order to open the 'New Voice Service Order' screen.
|
Step 2 - Fill in Voice order details under Summary tab
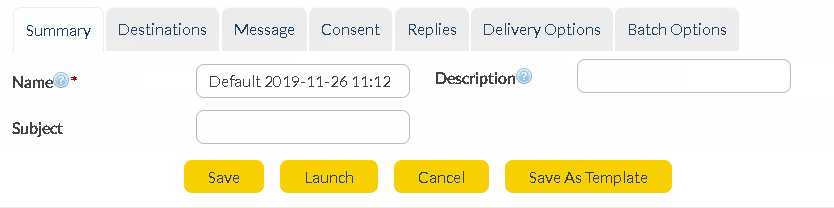
•You will be taken to the below page:
•Enter the name, description and subject for the voice order:
Name
|
Name of the order.
|
Description
|
Additional information about the message. This field can be left blank.
|
Subject
|
The 'Subject' field enables you to quickly identify the message in future (subject can be a maximum of 150 characters).
|
|
Step 3 - Select Recipients under Destination tab
|
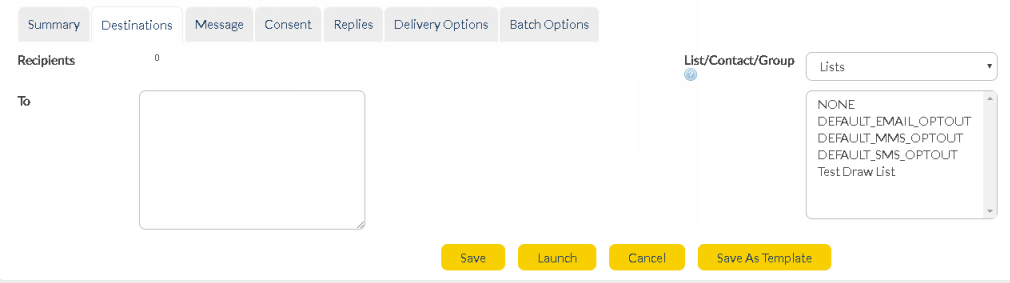
To
|
Type/paste number(s) in international format. You can add multiple destination numbers, 1 per line. There is no limit to the number of destination numbers you can add in this field. For example, 12912345678 or e.g. 12912345678 12912345679
•How to personalize using Mail Merge (click to expand)
You can type/paste extra personal information on each line which will let you customize the message for every individual recipient. Type/paste each piece of information on the same line as the recipient's mobile number, separated by commas. E.g - 12912345678,John,Smith
Later, when you create the message text in the 'Message' tab, each of these entries can be swapped for a number, in braces (curly brackets). E.g - 12912345678 = {1}; John = {2}; Smith = {3}
So, if you want to send a message to 2 recipients which reads: ' Hello <Firstname> <Lastname> welcome to the club', you would include the first name and last name on every line, separated by commas. E.g - 12912345678,John,Smith Or 12912345679,Bob,Woods
|
|
List/Contact/Group
|
Choose pre-existing destination(s) for your message. Select 'Lists', 'Contacts' or 'Groups' from the drop-down list. Click here for information about lists, contacts and groups.
Left-click to select the destination list(s) / contact(s) / group(s). Ctrl + left-click to select multiple list(s) / contact(s) / group(s).
IMPORTANT: When sending to contacts, Voice messages will be delivered to whatever number is stored in the 'Mobile' field of their contact details record by default.
If you want to deliver messages to a land line number, add it in the 'Mobile' field of their contact details. Click here for more information.
|
|

|
Only the first 1000 contacts/groups/lists will be displayed (in alphabetical order).
|
|
Step 3 - Send in your Voice order through Message tab
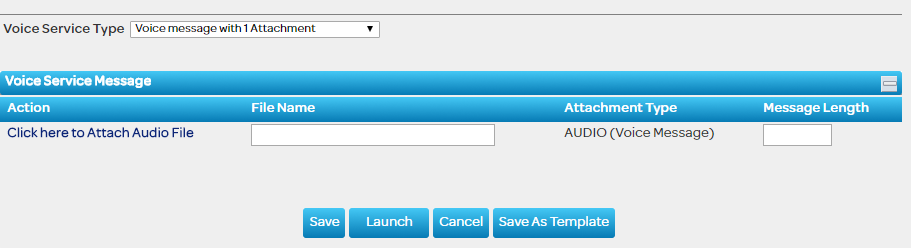
In order to send a voice order using attachment, select Voice with 1 Attachment as Voice Service Type. Select 'Click here to Attach Audio File' to select an audio file.
The following audio formats can be attached to messages. Maximum file size for all types is 450KB. This can be configured to a higher limit if required. Maximum running time for all Voice messages is up to 5 minutes (300 seconds).
|
AT&T GSMS Voice Messaging call duration is measured from the time the call is picked up to the time the call is terminated, and will include the duration of the voice mail prompt of the recipient's voice mailbox.
|
Supported types:
•MP3
•WAV
Jump to Step 4 -Consent.
|
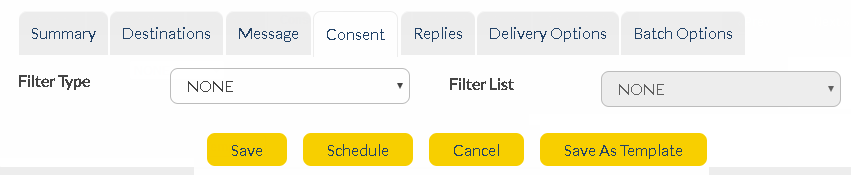
Step 4 - Filter Recipients using Consent tab
Filter Type - The type of filter (Blacklist/Whitelist) to apply to the outbound contacts/list.
•None - No outbound permission filters in place.
•Blacklist - No messages will be sent to the people listed in the blacklist.
•Whitelist - Messages will only be sent to people listed in the whitelist.
Filter List - Name of the list that is used as a blacklist/whitelist. The lists are filtered to only present 'TEXT' type Lists and not 'UPLOAD' or 'AUTOMATIC'.
|
Step 5 - Manage responses of Voice order through Replies tab
Reply To Address Type - Select from the drop-down menu for each message type. If a recipient replies to your message, this is the method by which it will be received. A copy of every message is stored and details can be viewed in Messages section of AT&T GSMS (i.e. INBOX).
Email
|
Reply is sent to both a nominated email address and directly into AT&T GSMS.
|
Inbound
|
Reply to this order will trigger an Inbound message. User must configure the name of the inbound order in the 'Reply to address'. As a preparatory set-up to add Inbound under Replies, user much set-up Inbound before sending a Voice order.
|
Inbox
|
Reply is received directly into AT&T GSMS platform only (not email inbox). Received messages can be viewed in Messages section.
|
Mobile
|
Reply is sent to both a nominated mobile number and directly into AT&T GSMS.
|
URL
|
Reply is sent to both a nominated web address and directly into AT&T GSMS.
|
Reply to Address - Type/paste the reply email address, phone number, URL or Inbound name for each message type. If 'INBOX' is your Reply to Address Type, this field is not required (replies will go straight into the messages inbox within AT&T GSMS.
|
Step 6 - Set up your Delivery Options
Delivery Frequency
|
Select your delivery frequency from the 'Delivery Frequency' drop-down menu. The options are:
•HOURLY, DAILY, WEEKLY, FORTNIGHTLY or MONTHLY - Ongoing; message is sent on the same day/time each week.
•IMMEDIATE - Message is sent immediately.
•ONCE - Message is scheduled for sending at a single specified time/date in the future.
•WEEKDAY - Sent only between Monday to Friday.
•WEEKEND - Sent only on a Saturday or Sunday.
|
Start Date and Start Time
|
The start date and start time of the order.
|
End Date and End Time
|
The end date and end time of the order
|
Priority
|
If you are running multiple orders simultaneously you can set the priority for each. Priority 1 messages will be sent before priority 2 messages and so on.
|
Registered Delivery
|
Check this box if you want to receive confirmation that a message has been delivered to a handset.
|
Timezone Open Hours
|
Specifies the times that messages can be delivered (useful if you don’t want to send messages out at night, after work hours etc.) Options include:
•No: Messages can be delivered anytime
•Default: Messages are only delivered between the times specified in the 'Default Timezone Open Hours'.
|
|
Step 7 - Send Voice Order in Batches via Batch Options
This feature allows you to control the rate at which messages are delivered. You may want some messages delivered at the same time, and others may need to be staggered. For example, if your message contains a prompt to call a phone number, you may want to stagger delivery so that your phone system is not overloaded with calls.
Batch Size
|
Edit the batch size here. The default is 500 (i.e. 500 messages per batch).
|
Batch Interval
|
Edit the interval between batches here. The default is 10 seconds.
|
Maximum Messages
|
This feature is useful if you are not sure how many recipients there are in a list, but you want to limit the number of messages sent so that you don’t exceed your budget. The default is 100,000 messages.
|

|
Store changes and exit
|

|
If 'Delivery Frequency' is 'IMMEDIATE', this button launches the order.
|

|
If 'Delivery Frequency' is 'ONCE', or a recurring value (e.g. 'DAILY'), this button activates the order so that it will be sent at that time (and/or frequency).
|

|
Undo any changes and exit.
|

|
Store order content as a template for later use.
|
|