This section presents the compilation of all the steps and quick links that would help you getting started with RapidAlert.
We have discussed an example in Product Overview. It is recommended to have a quick look at that example, before you start reading the below steps.
Step 1 - Setting up the license
It is important to get the license provisioned for this feature before you start using it. Please contact your account representative for further details.
Step 2 - Company Setup & Managing the preferences
Once the license provisioning is confirmed, the RapidAlert will appear in the menu bar and company settings of the AT&T GSMS. Next step is to manage the preferences and settings of the RapidAlert. The 'Company setup' option on GSMS allows you to setup your message preferences and enable 'Groups' for sending RapidAlerts. Please refer to RapidAlert - Company Setup & Preferences for details of configuring the Company setup and knowing more about Group settings.
Step 3 - Create your own custom templates
After 'Company Setup', the next step is to create unique templates based on your requirements. Click on 'New Template' option from the RapidAlert drop-down menu. You will be presented with different fields and headers. We have discussed each field and options in detail in the RapidAlert - New Template section.
Step 4 - View template summary
This step is optional and you may directly move to Step 5 if you do not want to view the summary.
Now that you have already created a quick template, let's have a look at it. Click on RapidAlert menu options to choose Template Summary. The summary page displays the list of existing templates including the one you just setup. To understand more on viewing summary, click here.
Step 5 - Send a RapidAlert
With the template you have created in Step 3, you can send a RapidAlert instantly. Click on the 'New RapidAlert' menu option and you would be presented with a form with below predefined fields.
•Templates - Displays a list of the predefined templates that we created in Step 3. When user selects one of the templates from the given list, the 'Message', 'Header' and 'All clear' field gets updated with the text automatically. If you do not see any template in this field, you need to create templates as explained in Step 3. Refer to RapidAlert - New Template for detailed steps of template creation.
•Recipients - Displays the list of destination Groups. Note that, as a prerequisite the shared groups should be defined using the Address Book function of GSMS. It must be further enabled for RapidAlert through the RapidAlert - Groups Settings. Once enabled in the settings, the Groups will show in the 'Recipients' list on this page. User can select one or more groups as the target to send the alerts.
•Message - Displays the text that will be sent in alert messages. It also includes an option for custom message and an option to request response from the recipients.
Please note, each of these fields and option has been discussed in detail in RapidAlert - New RapidAlert.
Once you fill in the above fields, hit Send to trigger the alert.
Step 6 - Monitor RapidAlert & View Statistics in Status And Control Tab
Once the alert messages are sent, we have a very effective tool for monitoring the messages sent and responses received. As soon as you send the alert, the 'Status And Control' tab appears. This section displays a pie-chart and the statistics that updates in real time with every 60 sec automatic refresh. It gives you all the useful data you need to monitor the incident. This pie-chart view appears as soon as you send the RapidAlert message.
The statistics will show: total messages sent, delivered, responded and most importantly, the recipients who have not responded.
Step 7 - Send Reminder
When recipients have not responded to the RapidAlert message as requested, you can resend the message as a reminder in one click.
As mentioned in Step 6, soon after you click on ![]() , the Status And Control tab appears with the statistics view. Just next to the No Response-data in this tab, you have a
, the Status And Control tab appears with the statistics view. Just next to the No Response-data in this tab, you have a ![]() button. Click on this button to send a quick follow-up message.
button. Click on this button to send a quick follow-up message.
Step 8 - Send All Clear
After clicking send on the RapidAlert, when the 'Status And Control' tab appears with the real time data, you will notice a ![]() button on this page. Click on this button to be able to send 'All Clear' message to all recipients.
button on this page. Click on this button to be able to send 'All Clear' message to all recipients.
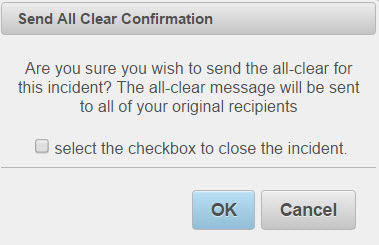
Send All Clear- feature allows you to send the predefined 'All Clear' message to all the recipients to indicate that the emergency is over. You may edit the text that is sent for All Clear while setting up the Message Preferences. Read here for more details.
Step 9 - Close the Incident
The last and the important step in RapidAlert is to close the incident. There are two ways you can close the emergency. While performing 'Step8 - Send All Clear', when we click on ![]() , a prompt appears to confirm sending the All Clear message, you will notice a checkbox to select if you want to close the incident. If you enable the checkbox, it closes the incident and state of the RapidAlert changes to closed.
, a prompt appears to confirm sending the All Clear message, you will notice a checkbox to select if you want to close the incident. If you enable the checkbox, it closes the incident and state of the RapidAlert changes to closed.
Optionally, you would see the ![]() button on the same page after sending the RapidAlert. Click on the button that displays a prompt to confirm closing. Once you click on OK, the state of RapidAlert changes to closed.
button on the same page after sending the RapidAlert. Click on the button that displays a prompt to confirm closing. Once you click on OK, the state of RapidAlert changes to closed.
Read here for further sdetails.