The 'RapidAlert Grou' setting enables you to select a single Group (one per RapidAlert) that you want to send the emergency messages to. It will appear in the Recipients menu drop-down while sending the emergency alerts.
In the Group settings, you would see the below screen:
|
|
The screen shows the list of 'Shared Groups' that are already configured through Address Books -> Groups functionality. Below options would appear on the screen:
|
Confirm and exit.
|
|
|
Modify details. |
Setup Steps:
Now we will select the Group for sending RapidAlerts. Please note that you must create 'Shared Groups' using the Address Book -> Group functionality. Refer to the 'Address Book-Groups section' in Personal Setup - Address Book for more details.
The 'Group Settings in RapidAlert' would only show the existing shared groups that have been created. Once you select the groups here, it will appear in the RapidAlerts 'Recipients' list while sending the messages. Follow the below steps to add a group to your RapidAlert setup:
1. Begin Editing: Click on the ![]() button.
button.
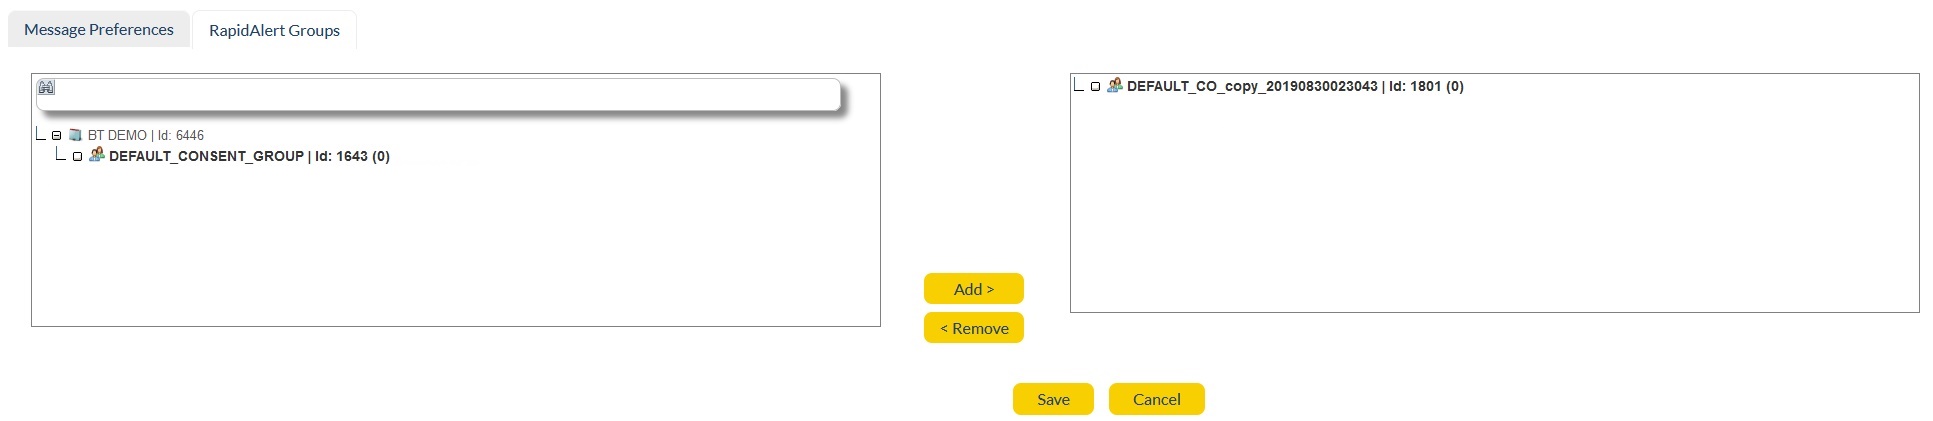
2. Select Groups: You may select one group (per RapidAlert) by clicking on one. Use the search functionality on top-bar of the group window to look for a specific Group. In the below example we have selected one group:
|
|
3. Add/Remove: Once the selection is done, click on Add button. Selected Group and all its branches will move to the right Group window. RapidAlert will retrieve a Group from this table when triggering an alert. Scroll down the panel and look for Group-Id to confirm you have selected the right Group. If you have added an incorrect Group, use Remove button to move it back to the left Group panel.
4. Save: Once the selection is done, click ![]() . Upon saving, you will be taken to the Message Preferences home screen.
. Upon saving, you will be taken to the Message Preferences home screen.
5. View Updated Summary: Click on RapidAlert Group to view the updated information.
6. Discard Changes: If the user wishes to discard their changes, click ![]() . You will be taken to the Message Preferences home screen.
. You will be taken to the Message Preferences home screen.
Note: Follow the steps above to perform the same action using a List.