Overview
Create a new StaffMatch shift order.
|
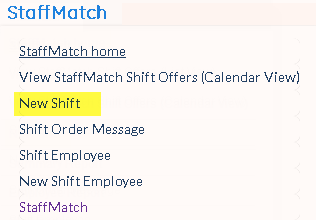
Click the 'StaffMatch' tab at the top of the interface to open the 'StaffMatch' drop-down menu.
Click 'New Shift' to open the 'New Shift' screen and compose a new order. |
Description
|
|
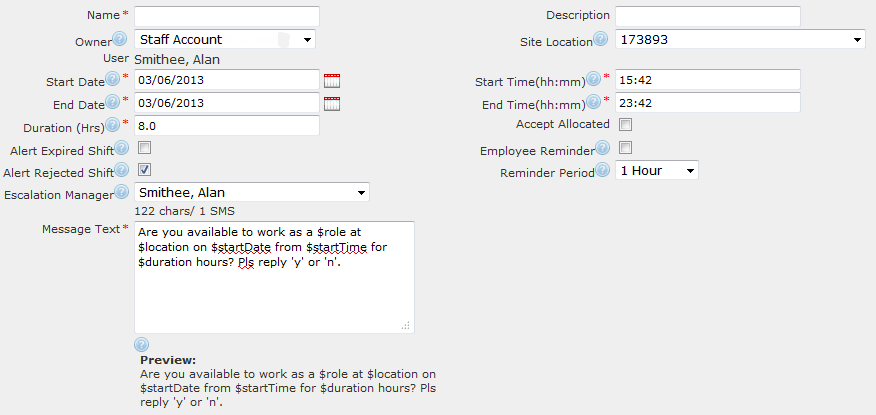
Name
|
A word or number to identify the order in summaries and reports (not seen by message recipients).
|
Description
|
A few words or a short sentence that will help users understand the purpose/content of the shift.
e.g. casual shift to cover annual leave.
|
Owner
|
Select from the drop-down menu. This is the parent customer who owns the shift.
|
Start Date
|
The shift begins on this date.
|
Start Time
|
The shift begins at this time.
|
End Date
|
The shift(s) end on this date.
|
End Time
|
The shift(s) end at this time.
|
Duration
|
The timespan of the shift, in hours.
|
Alert Expired Shift
|
If box is ticked, a message will be sent to the creator of the shift to notify them if the shift is not filled by the expiry date/time.
Choose whether you receive by SMS, email, or both, in StaffMatch Preferences.
This message can be customized in the Shift Order Message Details section of StaffMatch setup.
|
Alert Rejected Shift
|
If box is ticked, a message will be sent to the creator of the shift to notify them if the shift is rejected by a potential employee.
Choose whether you receive by SMS, email, or both, in StaffMatch Preferences.
This message can be customized in the Shift Order Message Details section of StaffMatch setup.
|
Accept Allocated
|
If box is ticked, it means that an employee can be assigned to a shift even if they are already assigned to a different shift.
|
Escalation Manager
|
Select from the drop-down menu. Choose another user to receive any critical replies or notifications about this shift order (e.g. when it expires) in addition to the order creator.
Ensures that there is a second person or team to handle and/or monitor responses (e.g. in case the order creator is not available).
The method by which the escalation manager receives notifications (i.e. email, SMS, both) will match whatever is in the order creator's StaffMatch preferences.
|
Message Text
|
The first message a potential worker will receive when you launch a StaffMatch order.
e.g. Are you available to work as a $role at $location on $startDate from $startTime for $duration hours? Pls reply 'y' or 'n'.
You can set up default text to auto-fill this field in the Shift Order Message Details section of StaffMatch setup.
|
Site Location
|
Select from the drop-down menu. This is the department, physical address, or sub-customer to which the order belongs. You can create locations in the Shift Location section.
If you are using the '$location' variable in your offer message, the 'Site Location' will replace it on the end message.
If there is already an actual location name in your offer message, this will be sent, and the 'Site Location' will be ignored.
e.g. If your offer message reads: 'Are you available to work at $location...'
and your 'Site Location' selection is 'The Moon'
the end message will read: 'Are you available to work at The Moon'
If your offer message reads: 'Are you available to work at Planet Earth...'
and your 'Site Location' selection is 'The Moon'
the end message will read: 'Are you available to work at Planet Earth...'
|
Employee Reminder
|
If box is ticked, the successful employee is sent a reminder message before their shift begins. You can choose when this is sent in the 'Reminder Period' field.
This message can be customized in the Shift Order Message Details section of StaffMatch setup.
|
Reminder Period
|
Select from the drop-down menu. If 'Employee Reminder' check box is ticked, a reminder message will be sent to the successful employee this many hours before the shift 'Start Time'.
|
Once all required fields are complete:
|
Store changes and exit
|
|
Undo any changes and exit.
|
Teams
|

This is where you choose the number and type of employees you want for the job.
|
Add new.
|
Name
|
A word or number to identify the team.
|
Role
|
Select from the drop-down menu.
|
Positions
|
The total number of jobs available.
|
Filled
|
The amount of positions that have been accepted and confirmed.
|
Available
|
The total amount of employees available.
|
Type/paste a unique team name, select the role name that you are looking for, then click one of the following icons:
|
Confirm and store.
|
|
Remove permanently from the system.
|
Add Employees
Once you have saved a team, the following icons will appear:
|
Display a list of employees who meet your job criteria.
|
|
Change details.
|
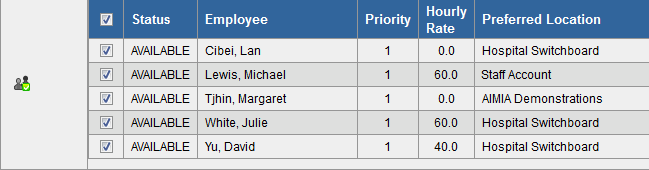
Click ![]() to view and select any suitable employees by clicking the check box next to their name. Employees are ordered by 'Priority', as defined in 'Shift Employee' settings.
to view and select any suitable employees by clicking the check box next to their name. Employees are ordered by 'Priority', as defined in 'Shift Employee' settings.
|
|
Send the job offer to the selected employee(s).
|
|
Click this to confirm an employee for a shift without sending any messages (e.g. if you have already received verbal or written confirmation of their availability). |
Confirm Offer
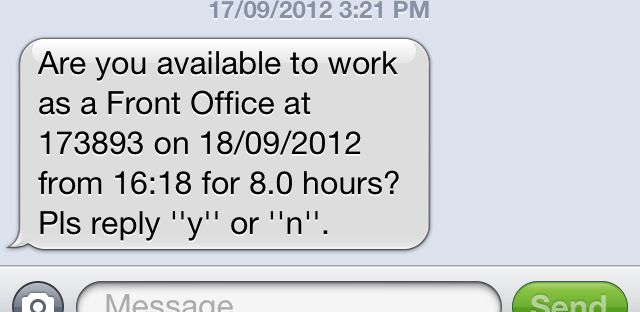
Once you have saved a team, confirm the offer message details and batch options.
The employee should receive a message on their handset similar to the following:
|


Once an offer has been sent, the following buttons will appear. Select an employee and click to mark them as sick or on leave:
|
Mark employee as unavailable due to illness.
|
|
Mark employee as unavailable due to leave.
|