Getting started with the AT&T GSM app is very simple. You need to perform below three steps to be able to start sending IP-based secure AT&T GSM messages.
Users for AT&T Gloabl Smart Messaging are managed through the standard AT&T Global Smart Messaging Suite powered by Soprano user management system. Please refer to the Manage Users topic.
In addition to standard functionality, administrators are also able to pre-provision a key a for the user to enter when they are activating their AT&T GSM mobile app. Pre-registering a user with an email key allows a customer administrator to pre-allocate a public key for a user's phone. This can be used to streamline the setup process for new users (they can copy and paste the key into the app instead of having to request one from the server via SMS) and can be used to remove the need for the registration SMS to be sent from the user's device.
Note: Pre-registering the user is an optional step.
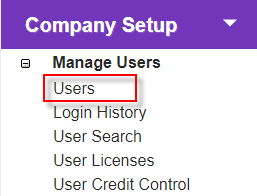
Steps 1. You can pre-register a user at the time of their creation. Go to Company Setup > Manage Users > Users.
2. Click
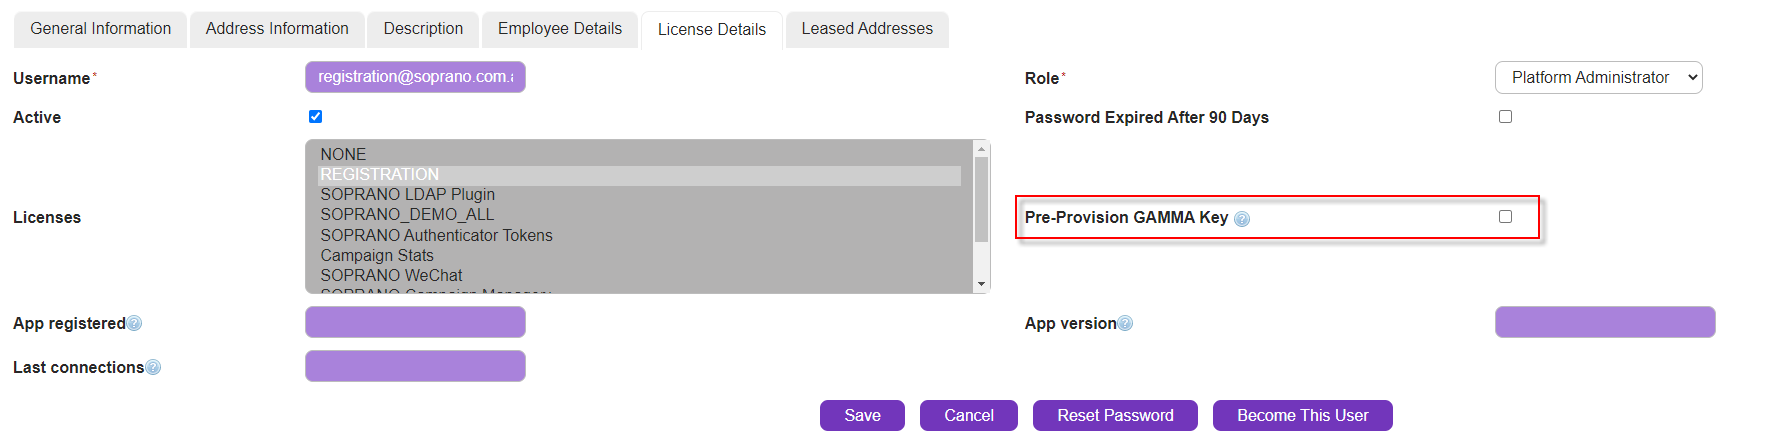
3. Go to the License Details tab and click the Pre-Provision GAMMA Key check box.
|
In order to begin using AT&T Gloabl Smart Messaging, users will need to install and set up the mobile app on their devices.
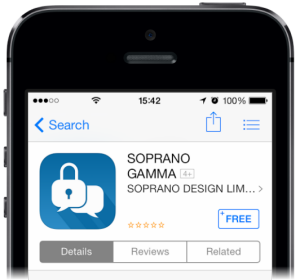
Download
Search AT&T Gloabl Smart Messaging on the App Store or on Google Play. Purchase the free app and wait for the download to complete.
Install & Register
1. App Install : There will be a brief wait while the installation completes. Once done, look for the AT&T Gloabl Smart Messaging icon on your home screen or your app screen. Tap the icon to open the app.
2. Allow Access : You may be prompted to allow AT&T GSM to access contacts and location services. Select OK to allow this access. Location services are only used as outlined in the Location section. If the user denies the access at this stage, it may be changed later by changing the 'device settings'.
3. Accept Terms & Conditions : You will be prompted to accept the Terms and Conditions. Select "Submit" (iOS) or "I agree" (Android). You may also receive prompts regarding other settings for the app, it is recommended to accept these prompts.
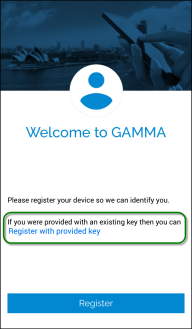
4. Register : You will then be prompted to either register using an SMS, or using a pre-provisioned key if you have received one via email. Select the applicable option.
For iOS only: If you do not have a pre-provisioned key, you will be prompted to send the registration SMS. Press Send on the SMS that generates to continue the process.
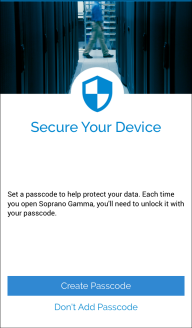
5. Set-up password : Once your device has registered, you will be prompted to select whether you would like to set up a password. Based on the administrative settings, you will be prompted to create a password, skip password or have no password at all. For more details about administrative settings on password policies, click here.
It is recommended to set up a password as it forms an extra element of security for the data stored in the app. If you choose to select a password, you will be taken to the password wheel with 'password Policy' link. Set your password as per the policy definition and press the tick button.
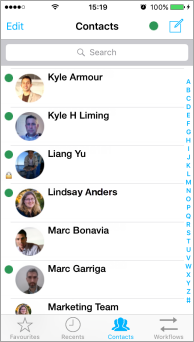
6. App Ready to Use : The app will then synchronize with the server and display the 'Contacts' page. Any contacts shared with you as defined by your user license will be displayed.
Additional Notes •Recent conversations will be at the top of the Recents tab. •New messages will appear in BLUE. •A padlock icon indicates encrypted conversation.
For information about personaliization of the app, please refer to the My AT&T GSM App section.
|
Accessing AT&T Gloabl Smart Messaging on Portal
Once your AT&T Gloabl Smart Messaging access has been provisioned, log into the AT&T GSMS platform using the supplied credentials. More information about logging into the AT&T GSMS platform and personalization of the web setup is available in this section.
Once you have accessed the portal, confirm that you can see a AT&T GSM tab in your menu bar.
|
