Overview
Create a AT&T GSMS list.
|
Click the 'Address Book' tab at the top of the interface to open the Address Book drop-down menu.
Click on the
Choose 'Add a new shared list' or 'Add a new personal list'.
'Shared' lists can be accessed by any users belonging to the parent customer, while 'personal' lists belong to the current user.
There are up to 3 visible tabs (click to jump to section):
List Information - Mandatory list name and optional description/report presentation fields
Content - Add list content.
List Delivery Schedule - Choose various scheduling options for keeping your list up to date.
|
Description
New List |
|

Name
|
The name of the order/broadcast. This is for internal use only and is not visible to message recipients.
|
||
Description
|
Type/paste any other information that will help identify the order.
|
||
New Photo |
Personalize your group by adding a unique photo to the profile.
Note: Image size can be a maximum of 10Kb.
|
||
List Owner
|
Indicates whether the list is 'Personal' or 'Shared'. 'Shared' lists can be accessed by any users belonging to the parent customer, while 'personal' lists belong to the current user.
|
||
List Presentation
|
Allows you to provide multiple fields in a list to be presented in message reports, a more meaningful data set than a mobile number. This field can utilize either plain text, or valid fields as listed below:
The 'List Presentation' field utilizes braces '{' '}' around a number e.g. {2} to represent field {2} of the list.
•e.g. {3} {4} - {5} [{6}] - {2}
Would represent the following output:
•e.g. Static Content
MAIL-ORDER-CAMPAIGN
The data within the messages summary would display 'MAIL-ORDER-CAMPAIGN' as the RECIPIENT (Outbound) or ORIGINATOR (Reply), together with the MSISDN in the message reports when exported.
|
|
The list presentation has a limitation of 1kb of data.
|
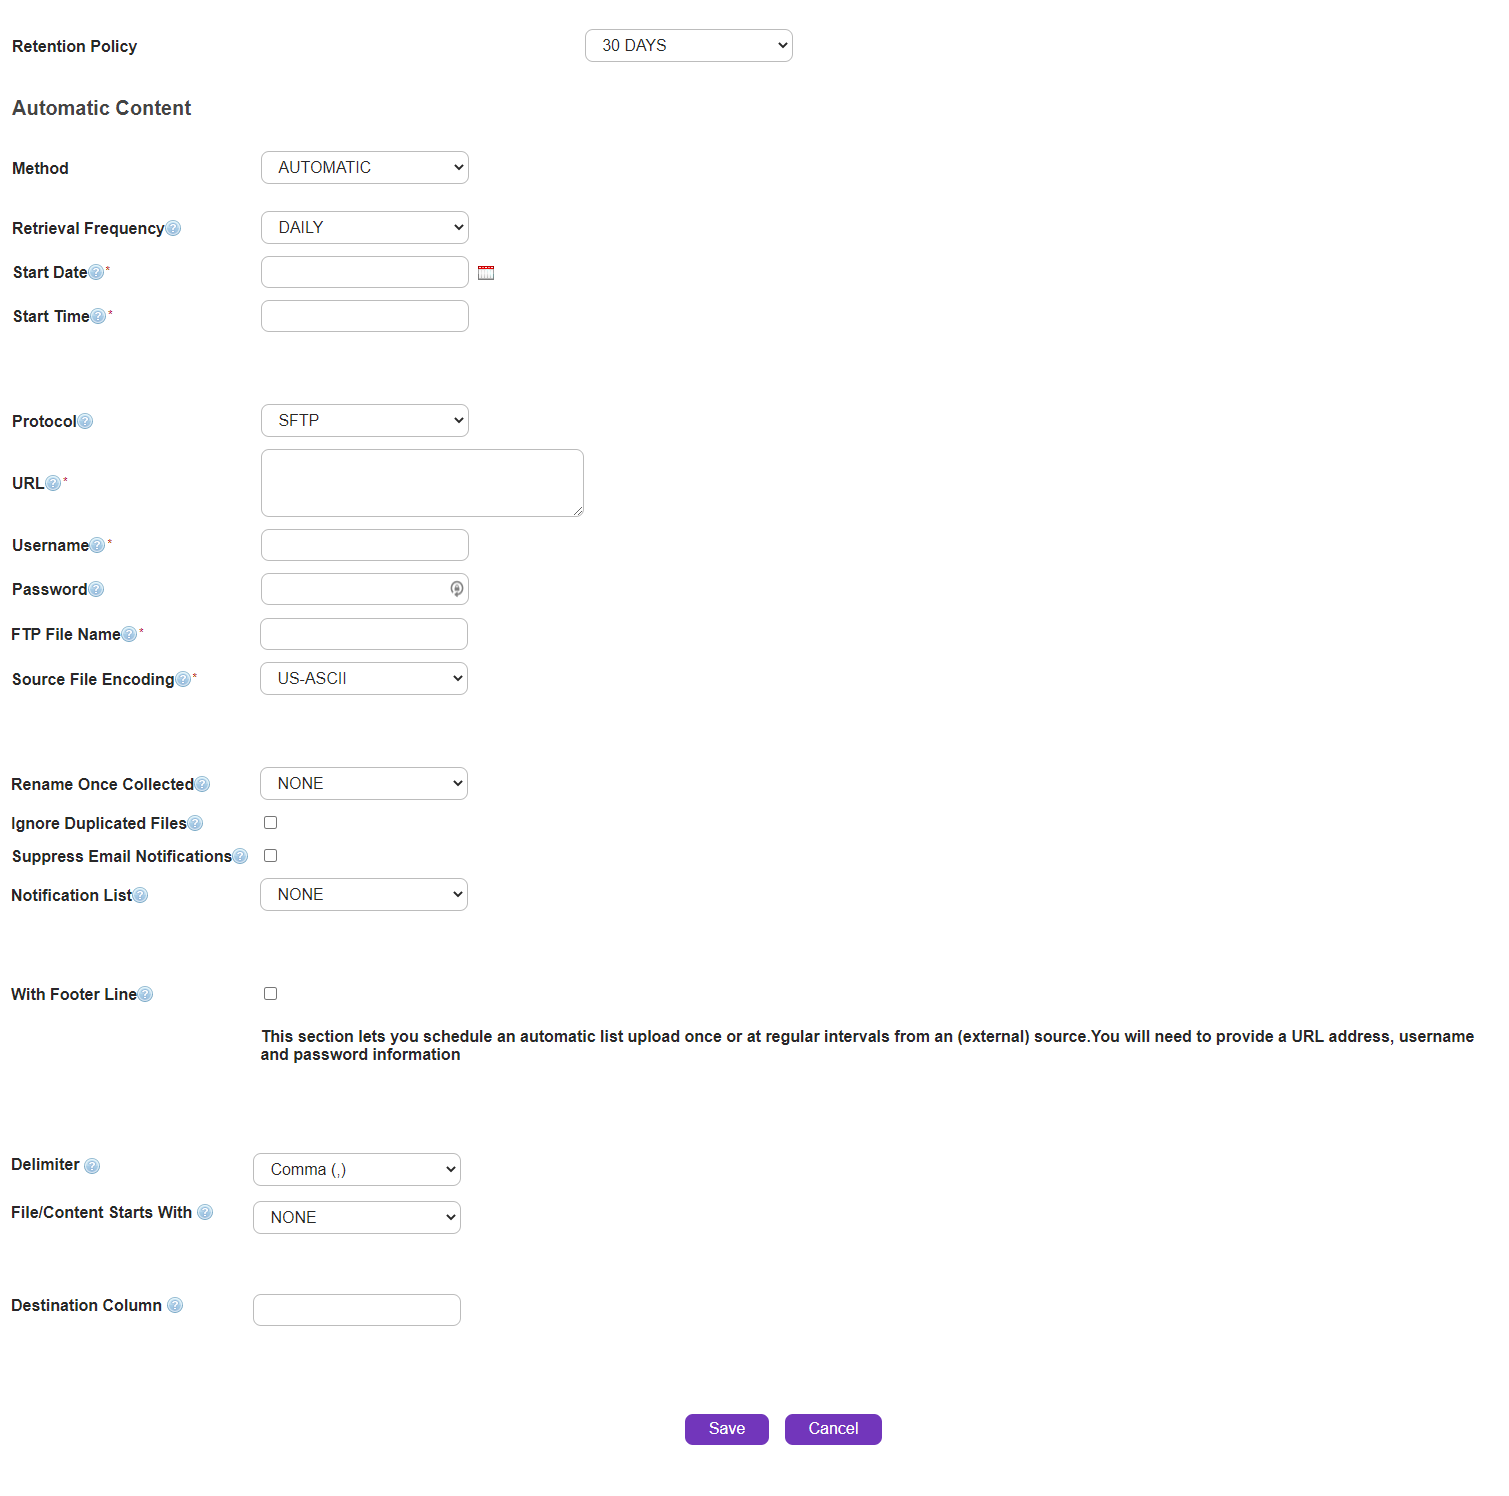
This section will display different fields depending on the 'Method' selection. There are several methods for creating list data:
•Retrieve a List over FTP (Automatic) - Provide URL, username/password information to upload a csv file from an (external) FTP server.
•Text - Type data in 'Content' field.
•Upload - Supply a comma separated variable (.csv), Excel (.xlsx) or text (.txt) file using the 'Import List' field.
Data can be scheduled to be automatically uploaded from an external FTP site (automatic lists). These uploads can be scheduled to occur at specific times or on a recurring basis.
Please note that you must provide and maintain your own FTP server to receive or provide files.
Upload list type's Retention Policy can be scheduled by users and determines how long the lists are retained within the system. The available choices are 'NONE', 'DELETE AFTER USAGE', '7 DAYS', '14 DAYS', '30 DAYS' or '90 DAYS'. The default Retention Policy value is '30 Days'. Users can modify the retention policy per List, as per their specific needs.
When AUTOMATIC list is processed by SMS Broadcast order, email is sent to the notification list configured under SMS Company Preference page. The email contains information of total recipients, total sent and total discarded.
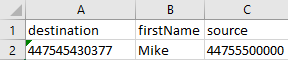
As a user creating a list, you can add a launch date time stamp for the message to be sent using the column header 'launchTimestamp'. This can be used when the list method is TEXT or UPLOAD or AUTOMATIC or AUTOMATIC_API and File/Content Starts with HEADER LINE.
<destination,firstName,launchTimestamp>
For Example ; 447545430377,Mike,2020-06-11T07:00:00.00+01:00.
The format for the Timestamp element is <YYYY-MMDDThh:mm:ss.sTZD>.
The List can also have a recurring delivery schedule mentioned within the List's Columns. When creating a list the header line can optionally contain a 'recurrence' field e.g. destination,firstname,recurrence. For list items you can optionally set the recurrence to daily, weekly, monthly or yearly (case insensitive) 447545439377,Mike,yearly.
Note: If the list item has 'launchTimestamp' set, the recurrence interval should be relative to the 'launchTimestamp'.
For Example; launchTimestamp = 20th June 2020 and recurrence = Yearly then the recurrence will be 20th June 2021.
If the list item doesn't have 'launchTimestamp' set, the message will be sent immediately and the recurrence will be relative to the date/time the message was sent.
Users can add short URLs to their Broadcast Orders by adding the URL to their list item under the column name 'ShortURL'. Create a list with a header field 'ShortURL' and add a list item under the field ShortURL :
Format: destination,firstName,ShortURL
For Example ; 447545430377,Mike,www.sopranodesign.com
Users can enter a valid source address as a column entry in the format displayed in the below Example.
|


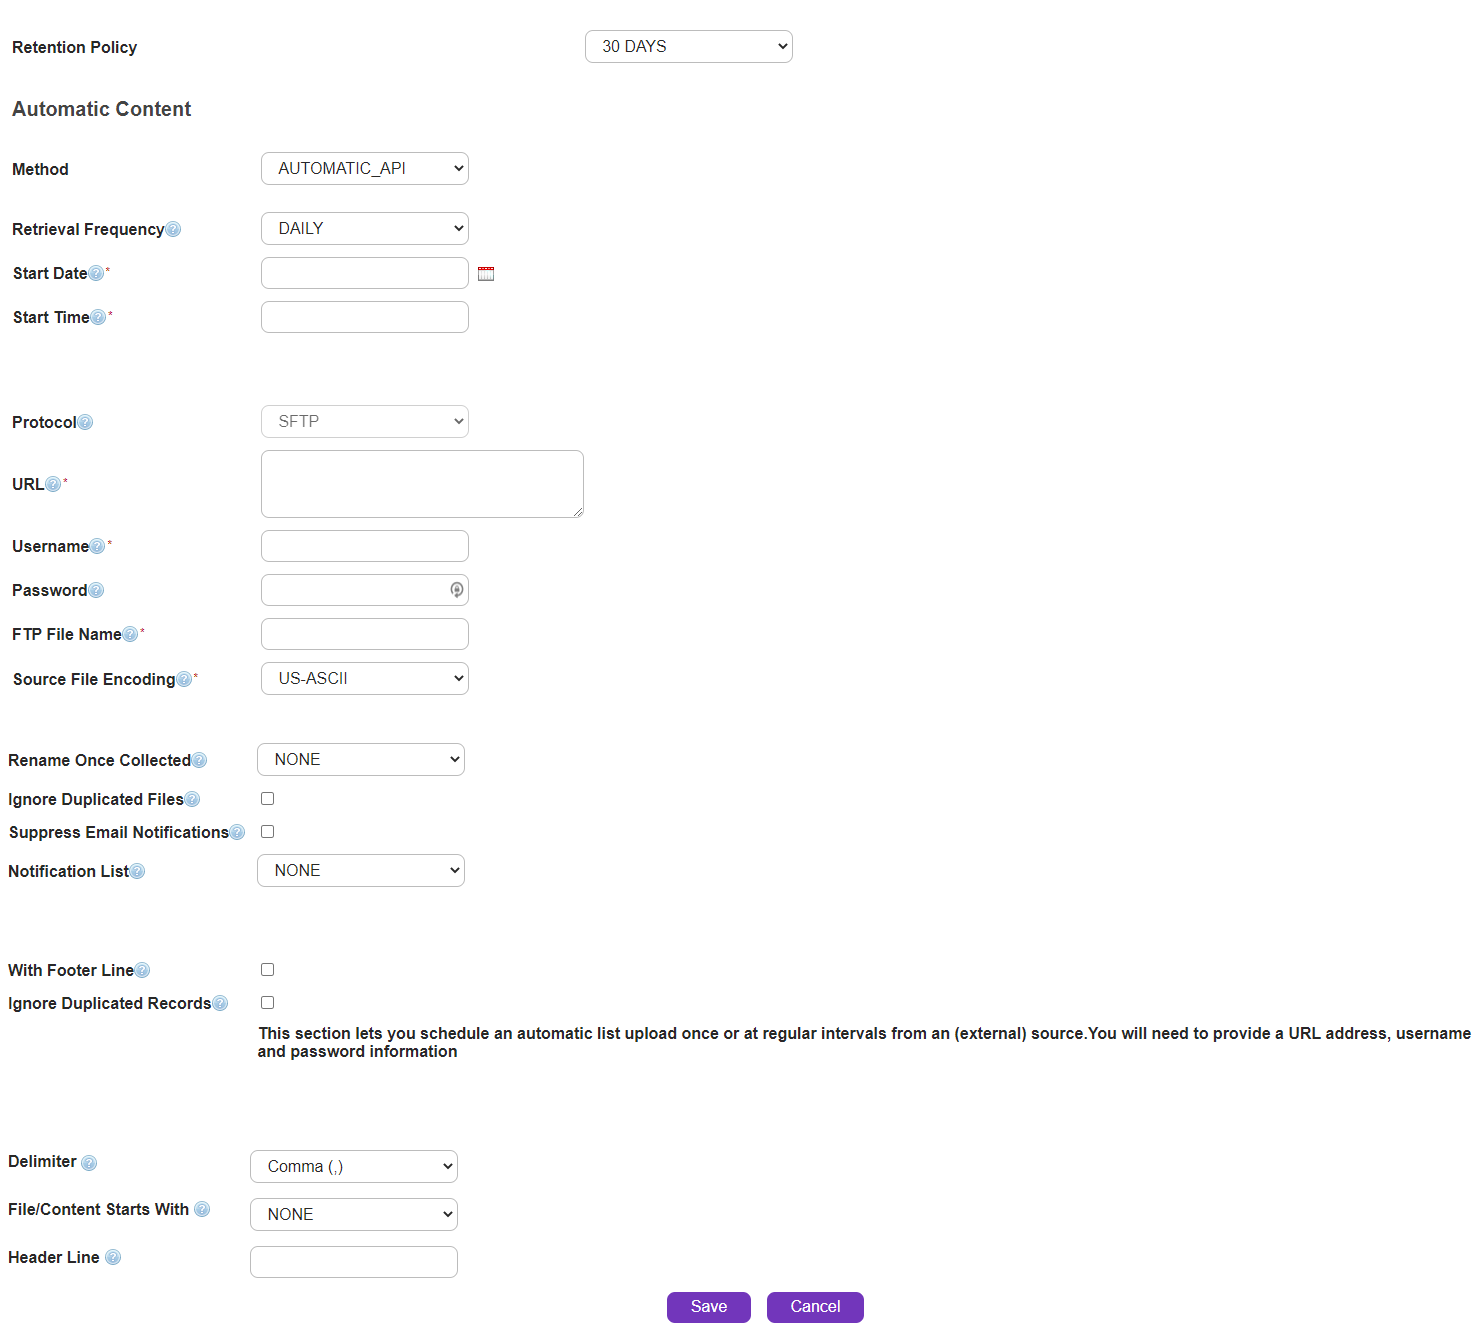
Data can be scheduled to be automatically uploaded from an external FTP site (automatic_api lists). These uploads can be scheduled to occur at specific times or on a recurring basis.
Please note that you must provide and maintain your own FTP server to receive or provide files.
Upload list type's Retention Policy can be scheduled by users and determines how long the lists are retained within the system. The available choices are 'NONE', 'DELETE AFTER USAGE', '7 DAYS', '14 DAYS', '30 DAYS' or '90 DAYS'. The default Retention Policy value is '30 Days'. Users can modify the retention policy per List, as per their specific needs.
|
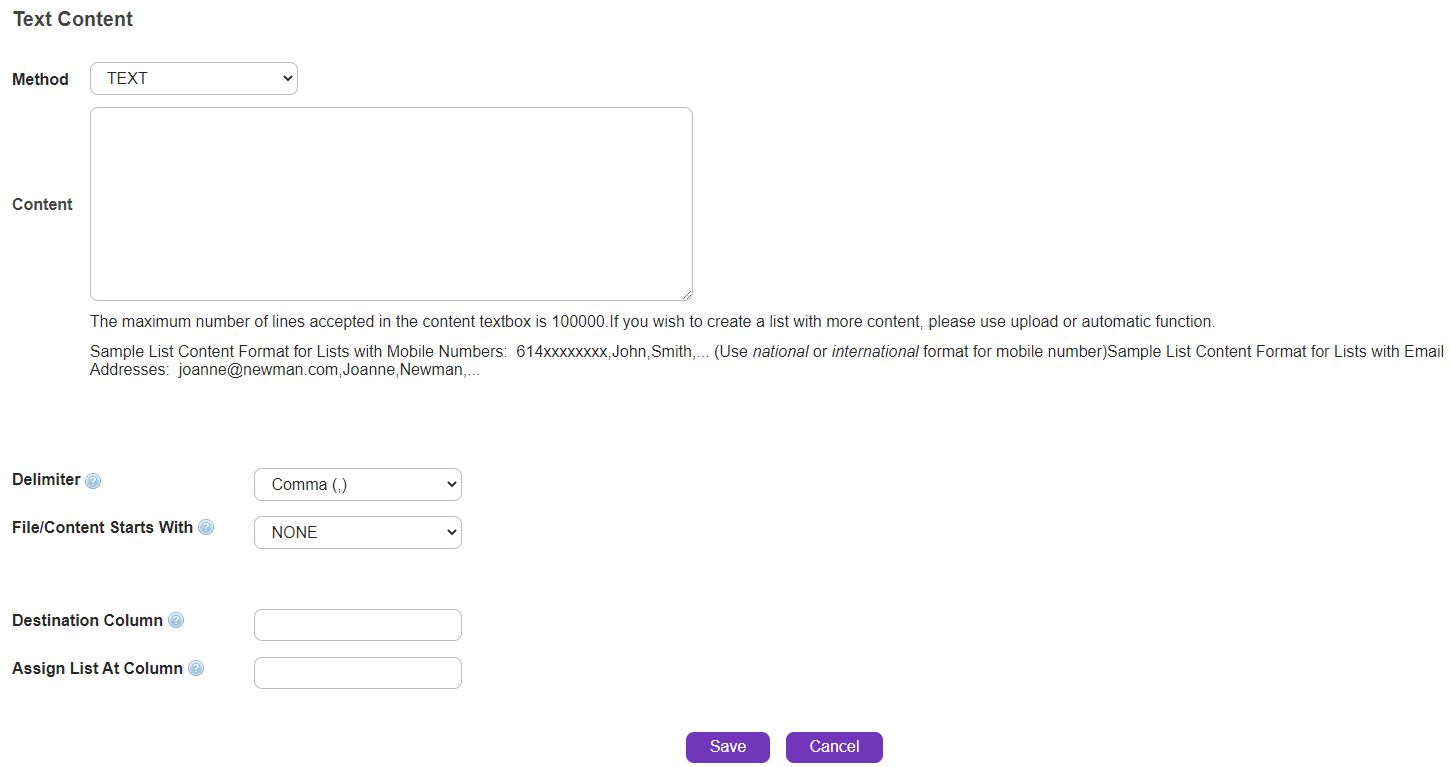
List data can be typed/pasted directly into the 'Text Content' field (Note: maximum number of lines accepted is 100,000).
|
List can be created by supplying a comma separated variable (.csv) file using the 'Upload' option.
Upload list type's Retention Policy can be scheduled by users and determines how long the lists are retained within the system. The available choices are 'NONE', 'DELETE AFTER USAGE', '7 DAYS', '14 DAYS', '30 DAYS' or '90 DAYS'. The default Retention Policy value is '30 Days'. Users can modify the retention policy per List, as per their specific needs.
|
||||

Method |
Select 'UPLOAD' from the drop-down menu.
|
Import List |
Click on 'Choose File' to select the file on the User's local Desktop. The file should be in csv format and maximum size supported is 20MB. In the csv file, the first column should be the recipient, i.e. Mobile number in national or international format for Mobile campaigns and email address for email campaigns.
•e.g. Mobile - 12912345678,John,Smith,...(use national or international format for mobile number).
•e.g. Email - john@smith.com,John,Smith,...
|
Source File Encoding |
Select from the drop-down menu (leave as default unless you wish to display foreign characters):
•US-ASCII •UTF-8 •UTF-16 •ISO-8859-1 •ISO-8859-2 •ISO-8859-3 •ISO-8859-4 •ISO-8859-5 Cyrillic •ISO-8859-6 Arabic •ISO-8859-7 Greek •ISO-8859-8 Hebrew •ISO-8859-9 •ISO-8859-11 •Big5 •Big5-HKSCS •GB18030 •GB2312 •GBK
|
File Starts With |
Choose "Header Line" to indicate if the first row of the sheet is a header (for example, Column name) or choose none if not applicable. |
Destination Column |
Indicates which column contains the recipient's destination details. |
Upload Multiple lists via List Names
|
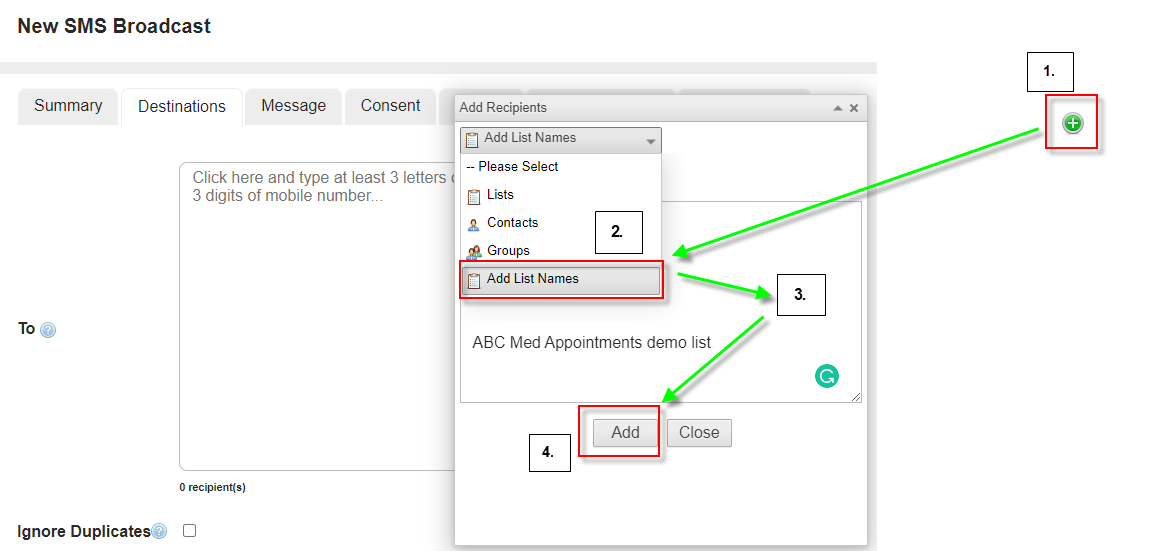
Step 1 : Click on the '+' button to open up the upload options.
Step 2 : Choose the option "Add List Names'
Step 3 : Enter the specific list by their names in the text box.
Step 4 : Click on 'Add' to complete the action.
|

Delivery Frequency
|
Select as required:
•DAILY
•MONTHLY
•NONE (note: Selecting 'NONE' will cause all other fields, except 'Deliver Empty Group' and 'Delete Delivered Contacts', to be 'greyed-out').
•WEEKLY
•HOURLY
•Every 15 mins |
Delivery Method
|
Select as required:
•FTP
•HTTP
•SFTP
|
Start Date
|
Commencement date for list delivery - format DD/MM/YYYY. Click the
|
End Date
|
Termination date for list delivery - format DD/MM/YYYY. Click the
|
Start Time
|
Commencement time for list delivery in '24-hour' time (e.g. '15:00' = Three o'clock in the afternoon).
|
End Time
|
Termination time for list delivery in '24-hour' time (e.g. '16:00' = Four o'clock in the afternoon).
|
Update Option
|
Click radio button as required:
•New Content - When a list is updated via scheduled delivery, only new content will be uploaded to the list.
•Complete Content - When a list is updated via scheduled delivery, the full content will be replaced.
|
Naming Convention
|
Naming convention allows the user to define the naming format of the file that they would like to create as part of the list delivery. The naming convention can be made up of alphanumeric characters, with the following character strings defining date variables:
•yyyyMMddHHmm, e.g. 200909011015
•yyyyMMdd, e.g. 20090901
•yyyyMdHHmm, e.g. 20099110
•yyyyMd, e.g. 200991
•yyMMddHHmm e.g. 0909011015
•yyMMdd, e.g. 090901
•yyMdHHmm, e.g. 09911015, for 1st September, 2009 at 10:15am
•yyMd, e.g. 0991, for 1st September, 2009 at 10:15am
e.g. 'mycrmlist-yyyyMMdd' would equate to 'mycrmlist-20090901.csv'
|
Deliver Empty File
|
If box is checked, CSV file will still be delivered even if it contains no data.
|
Delete Delivered List Items
|
Remove delivered list items.
|
Settings
Note: This section will not appear if user has selected 'NONE' in the 'Delivery Frequency' drop-down menu in 'Delivery Schedule' section.
|
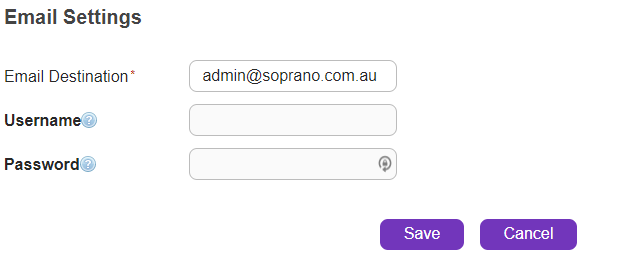
Email Destination/URL
|
The delivery destination email address (if Delivery Method is 'EMAIL') or URL (if 'Delivery Method' is 'FTP', 'HTTP' or 'SFTP').
|
Password
|
User's login password.
|
Username
|
User's login username (same as registered email address).
|
After the required changes have been made:
|
Store changes and exit
|
|
Undo any changes and exit. |