Overview
Generate or export a message report using a variety of filters.
In the 'Reports: Home' screen, click 'Message Report' report in the 'Message' section.
|

Description
Message Summary |
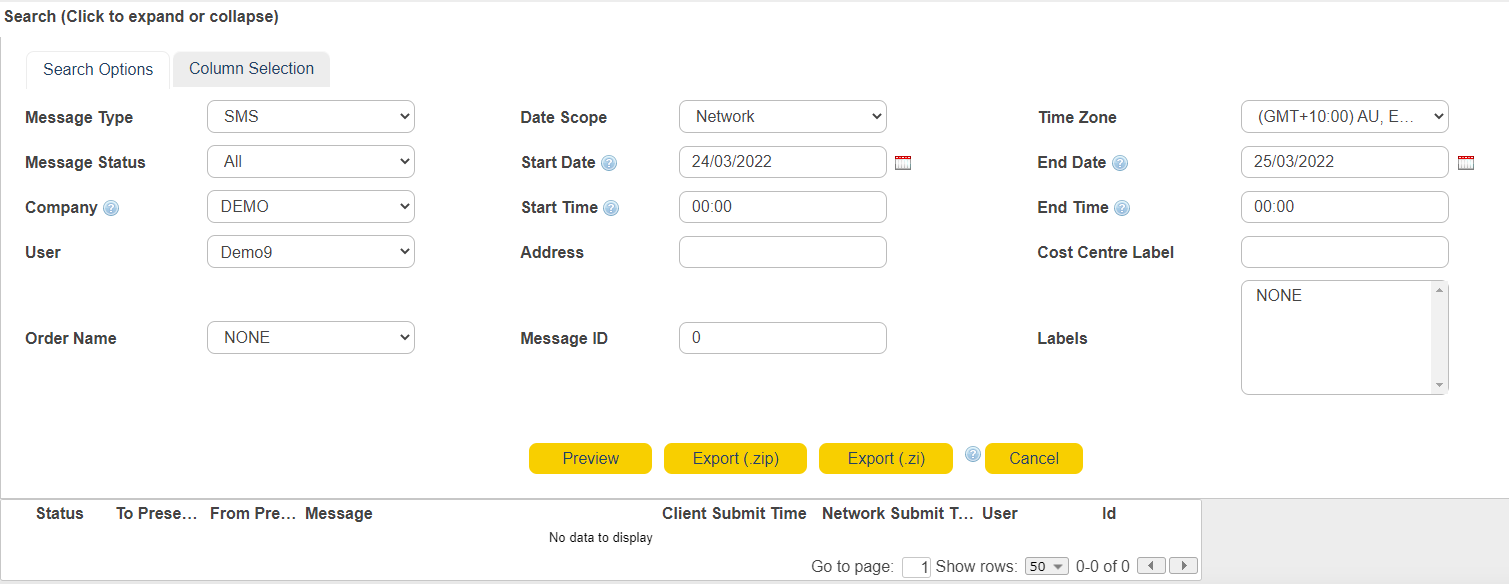
Search Options
|
|
Choose search filters.
Search Options |
|
Message Type
|
Type of message to run the report for. The options include: SMS, Voice, Email, RCS, Business Chat or WhatsApp.
|
Message Status
|
Status of the messages to report on. Options include: ALL, Sent, Received and Failed.
|
Date Scope
|
Select from the drop-down menu. Indicates whether the report is querying the client application, or the connection from AT&T GSMS towards the operator network.
|
Customer
|
The customer/sub-customer to run the report for. If you do not have any sub-customers, this will be your root customer name.
Note : If the root customer is selected, data for that customer and all sub-customers will be returned.
|
User
|
Select from the drop-down menu or select 'All'. Define a specific user that you wish to report activity for, if required.
|
Address
|
The destination mobile number that you wish to report activity for.
|
Labels |
Labels are assigned while reports are created. These are unique identifiers which help Users who have created the Report or other Users who would like to view Reports, be able to search for the reports easily without having to scroll through a whole set.
For example: Users searching amongst a bunch of medical reports can look for fractures by assigning the Labels as "Fracture Injuries". |
Search by Order ID |
All reports are created with an Order ID. These Order IDs are unique ID numbers assigned to each Report. This is done to segregate each report easily at the time of export.
* This feature can be utilized by Users and Admins alike. |
Cost Center Label
|
The 'Cost Center' that you wish to report activity for.
|
Order Name
|
The 'Order Name' that you wish to report activity for.
|
Start Date/Time; End Date/Time
|
Click
|
|
Display the first 1000 records on-screen. You can view the contents of a message in line by clicking on the dropdown arrow in the leftmost column.
|
|
Email a zip file containing report data. Click button and select an option from the drop-down menu
The file will be sent to the current user's email address as defined in their 'Personal Information' settings'.
Click here for more information on message report export format.
|
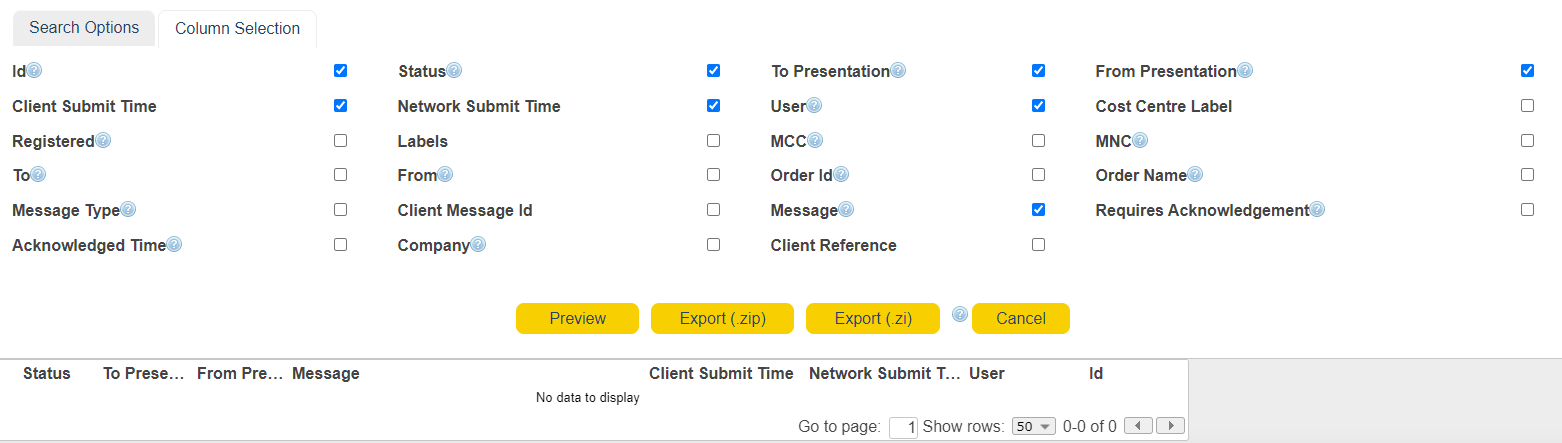
Column Selection |
The "Column Selection" tab is available for users to choose individual columns that need to be visible in the viewed / exported reports. This gives the users flexibility to be able to view only specific use-case columns. Each time the Users would like to view reports a little different, they can use the "Column Selection" feature. |
|
Maximum search timespan is one month (up to 31 days) within the recent 90 days period. Contents that are more than 90 days are automatically wiped from the system thereafter. AT&T GSMS will adjust the start/end date regardless of what is entered by the user. This can be modified at a portal level. Raise a help ticket via help@sopranodesign.com for more information. |
Message List
|

|
If your requested report exceeds the maximum amount of rows which can be displayed, it will be sent to you by email. |