Overview
Import employee details into AT&T GSMS from an external .csv file.
|
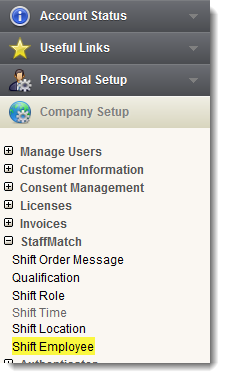
Click the 'Shift Employee' link in 'Company Setup > StaffMatch' to open the 'Shift Employee Summary' screen (also accessible via 'StaffMatch' tab drop-down menu).
Click 'Import' in title bar to open the 'Import Shift Employee' screen. |
Description
|
Before you can import employees, you must create a .csv file in Excel which contains all the required information.
Open Excel, and add employee information according to the following format:
|

There must be no more than one value per cell. Each row represents one employee; each column represents a field in a new employee record in AT&T GSMS. Include all mandatory information, and any optional information.
Any of these values can be included as a column in your .csv file.
General Information
First Name
|
First, or given, name.
|
Last Name
|
Surname, or family name.
|
Phone
|
A mobile or landline phone number. This is a secondary or alternative number which is stored, but not used, by AT&T GSMS.
|
Fax
|
Optional fax machine number.
|
Mobile
|
Primary mobile number in international format.
If this field is not accessible (i.e. greyed-out), it means the employee is also a AT&T GSMS user, and you cannot alter their pre-existing details from here.
|
Driver's License
|
Optional driver's license number.
|
Alias
|
A nickname or alternate name (e.g. if name is 'Edward Wood Jr', nickname might be 'Junior').
|
|
Primary email address.
If this field is not accessible (i.e. greyed-out), it means the employee is also a AT&T GSMS user, and you cannot alter their pre-existing details from here.
|
Language
|
The employee's first, or preferred, language.
|
Number Plate
|
Optional vehicle license plate number.
|
Mailing Address
Street/Suburb
|
The physical street address for correspondence (e.g. 100 Walker Street, North Sydney).
|
City
|
The city or town of residence (e.g. Sydney, New York, London).
|
Zip/Postal Code
|
Mailing zone number or code for the state (e.g. 2060, CA).
|
Employee Information
Employee Number
|
Optional employee identifier.
|
Title
|
Employee's professional title.
|
Zip/Postal Code
|
Mailing zone number or code for the state (e.g. 2060, CA).
|
Priority
|
Indicates employee preference level (e.g. priority '1' employees are preferable to priority '2', etc).
You can view the priority number of employees when creating a shift order. This allows you to create a basic hierarchy of employees based on criteria like performance, reliability, skills, education etc.
|
Minimum Shift Hours
|
The shortest amount of time, in hours, that the employee is willing to work at a time (e.g. 4).
|
Maximum Shift Hours
|
The longest amount of time, in hours, that the employee is willing to work at a time (e.g. 8).
|
Employment Type
|
This indicates the category of work the employee is interested in.
Options are:
•Casual
•Full Time
•Part Time
•Permanent Part Time
|
Department
|
Select from the list. The employee is eligible to work within any of the chosen departments.
|
Cost Center ID
|
An optional identifier if the employee is linked to a particular cost center.
|
Cost Label
|
An optional identifier if the employee is linked to a particular cost center.
|
Hourly Rate
|
The amount an employee is required to be paid
|
Minimum Week Hours
|
The shortest amount of time, in hours, that the employee is willing to work within any given week (e.g. 100, 200).
|
Maximum Week Hours
|
The longest amount of time, in hours, that the employee is willing to work within any given week (e.g. 150, 200, 210).
|
Once you have typed/pasted all the employee information you want to import, save the spreadsheet as a CSV file type.
Upload .csv File
|
Locate and select the saved CSV file on your local or network drive.
|
Navigate to find a file on your computer or network.
|
Source File Encoding
|
Default is 'US-ASCII', which supports all English characters. Select an alternative if you need to support international/foreign characters.
|
First Line is Header Line
|
Tick this box to ignore the first line of your .csv file when uploading (e.g. if first line contains column headings and not actual employee information).
|
Once all required fields are complete:
|
Begin importing data.
|
|
Discard changes and exit.
|
Map Employee Details
Map the required information from your CSV file to the matching fields. Some fields contain drop-downs which cannot be mapped. Choose the required pre-existing option from these fields.
|
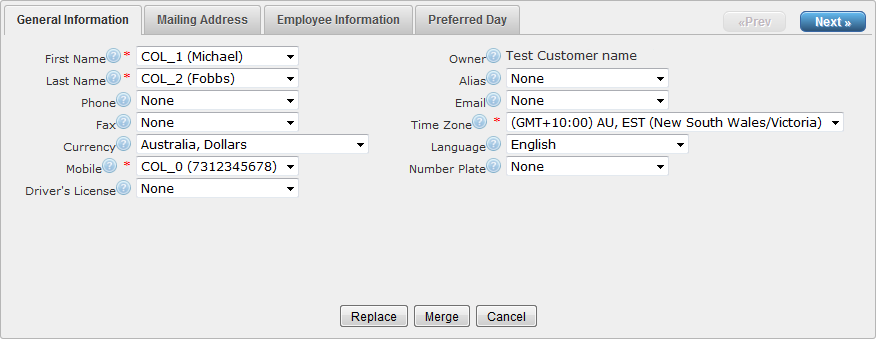
Once all required fields are complete:
|
Remove all existing data and replace with the imported file.
|
|
Keep the existing data and add only new data from the imported file.
|