As a customer administrator with valid LDAP (Active Directory) Plug-in licenses, you have privileges to set up synchronization connectivity settings for your company directory. Once the sync-settings are created, admins must create mapping of these settings with entries i.e. at Customer or Sub-customer level. This is a one-time setup and once sync-items are created, AT&T GSMS runs synchronization through LDAP (Active Directory) Plug-in periodically to update the directory.
•Login to GSMS portal using valid login credentials.
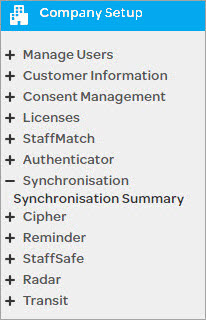
•Navigate to Company Setup in the left navigation panel.
•Select Synchronisation > Synchronisation Summary.
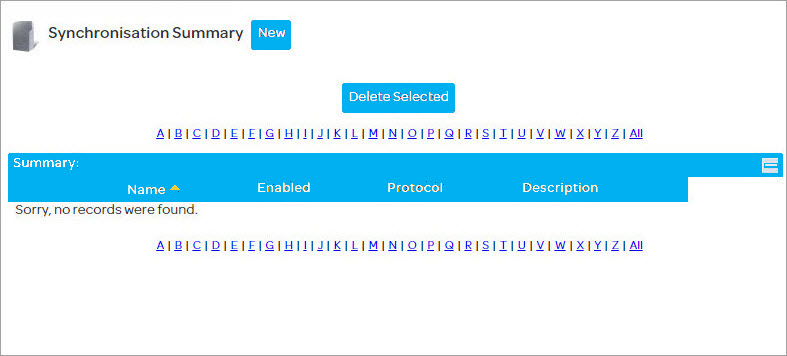
•If Sync-settings are already configured, this page will display them as summary. Now let’s create a Sync item using LDAP (Active Directory) Plug-in.
You should be in Company Setup > Synchronisation > Synchronisation Summary page as explained in section above.
•Click on New button.
•New Synchronisation page will appear as shown below:
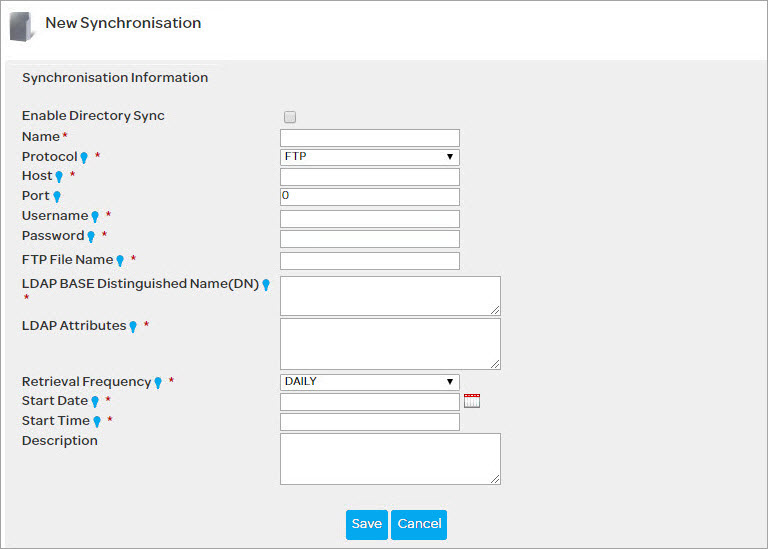
•Enter fields as described below:
Parameter |
Description |
|---|---|
Enable Directory Sync |
Optional, Enable or disable the defined sync settings based on needs. |
Name |
Mandatory, Enter a unique name for sync settings. |
Protocol |
Mandatory, Options:
•FTP •FTPS •SFTP •LDAP • Select any of the above protocol that will be utilized while running LDAP queries from the remote server. If LDAP is selected, extra settings appear on the screen that is addressed in next step. |
Host |
Mandatory, Enter host address. |
Port |
Mandatory, Enter the port for connecting to Active Directory Plugin server. |
Username |
Mandatory, Enter the credentials for authenticating against the Active Directory Server. For example “dc=admin, dc=com”. |
Password |
Mandatory, Enter the credentials for authenticating against the Active Directory Server |
FTP File Name |
Mandatory if selection or protocol is FTP, FTPS, SFTP. Enter the filename along with the path to be retrieved for AD-Plugin Sync. |
LDAP Base Distinguished Name |
Mandatory, Base DN defines the starting point or the absolute point of the LDAP tree for each search. For example “dc=admin, dc=com”. |
LDAP Attributes |
Mandatory, Enter the attributes to be returned as response to query results. This should be a comma-separated list of fields in the order of expected retrieval. |
Retrieval Frequency |
Mandatory, Select frequency for data retrieval. Options:
•Daily •Weekday •Weekend •Weekly •Fortnightly •Monthly
|
Start Date |
Mandatory, Start date for file retrieval & LDAP sync. Format DD/MM/YY. |
Start Time |
Mandatory, Start time for file retrieval & LDAP sync. Format HH:MM. |
Description |
Optional, Enter a description of the sync settings. |
•If users select LDAP as a protocol in the Sync settings, additional fields appear on the screen. Below is the description of those fields.
Parameter |
Description |
|---|---|
LDAP Encryption |
Select preferred encryption from the dropdown menu. Options:
•Plain Text •SSL •TLS |
LDAP Authentication |
Select authentication mechanism for LDAP. Currently, supported option is Simple. |
LDAP Query |
Enter a query to filter the search results and retrieve selective information. Table 1.1 provides more explanation and hints in order to help users set the data. |
•Click Save.
•Once you have filled in all the fields with the help of above parameter table, the Synchronisation Information will look similar to the below screen:
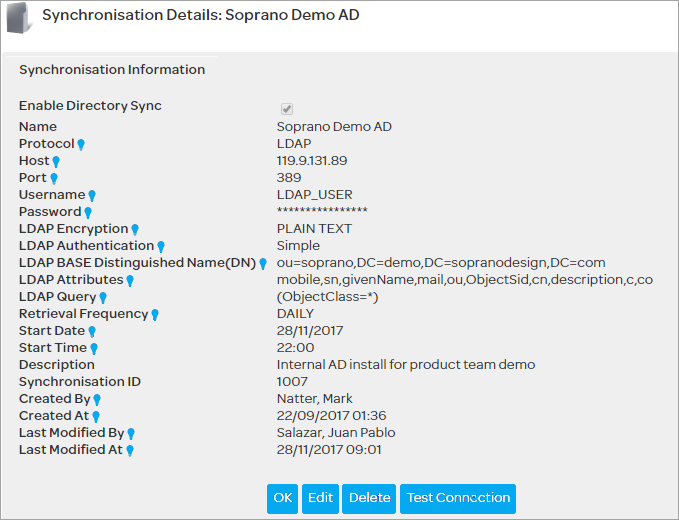
•As soon as Sync-information is created, a Test Connection button appears on the screen.
•Click on Test Connection to verify the LDAP (Active Directory) Plug-in sync settings. Return of first 10 DN entries indicates a successful connection. In case of errors, please attempt again. Clicking the Test Connection is only to verify the connection and does not trigger the sync-mechanism so it can be attempted multiple times if needed.
Now, we have successfully configured LDAP (Active Directory) Plug-in sync settings. Next step is to enable the sync at Customer-level.
Setup Object Mapping
By the end of this section, AD-Plugin settings will be configured and we will be just a click away to run our first sync.
•Login to GSMS portal using valid login credentials.
•Navigate to Company Setup > Customer Information > Company Information.
•Switch to Directory Sync tab and below screen would appear:

•Click on Edit button to update the Sync settings at customer level :

•Enter fields as described below:
Parameter |
Description |
|---|---|
Configuration |
Select a preconfigured sync-setting from dropdown. Note that the dropdown will display none if Admin has not setup Synchronization. |
Source ID |
Unique identifier of the source system that relates to its synced customer. |
Sync Person as |
Select either of the two options from dropdown:
•Contacts - Selection of 'Contacts Only’ will result in the system only creating the AD persons as 'Contacts' under the relevant 'customer/sub-customer.
•User & Contacts - Selection of 'Users and Contacts' will result in the system creating users under the relevant customer/sub-customer.
|
Create User Password |
Tick this check-box to create a password to access AT&T GSMS for every newly created user.
Note: Not all users may be required to access GSMS. |
Create Sub-customer Password |
Tick this check-box to create a password to access GSMS for every newly created user in all sub-customers.
Note: You may wish users in one organizational unit access to GSMS but subsequent sub-customer may not require this access. |
Object Class Map |
|
Object Class |
All Mandatory |
User |
Specifies objectClass attribute’s value in the source data that maps to a user. |
Customer |
Specifies objectClass attribute’s value in the source data that maps to a customer. |
Customer Field Map |
|
Customer Field |
All Mandatory |
Name |
Read-only, Specifies the name of attribute in the source data that maps to sub-customer’s name. |
Source ID |
Read-only, Specifies the name of attribute in the source data that maps to sub-customer’s unique source ID. |
User Field Map |
|
User Field |
All Mandatory |
Source ID |
Specifies the name of attribute in the source data that maps to user’s unique source ID. |
Specifies the name of attribute in the source data that maps to user’s email. |
|
First Name |
Specifies the name of attribute in the source data that maps to user’s First Name. |
Last Name |
Specifies the name of attribute in the source data that maps to user’s Last Name. |
Mobile |
Specifies the name of attribute in the source data that maps to user’s mobile. |
Country |
Specifies the name of attribute in the source data that maps to user’s Country. |
Once you have filled in the above fields, Directory Sync settings for users will appear similar to the below screen:

Important Notes:
•Customer Mapping values must be the attribute within AD to map to the name in GSMS Customer. Administrators must ensure that the name is accurate.
•Customer names must be unique across GSMS. The LDAP (Active Directory) Plug-in sync procedure will ensure this is the case automatically by providing customer names resembling the directory structure in AD.
•Customer Synchronisation Source Id Attribute will always be ‘dn’ and is read-only. Customer Name Attribute will always be ‘ou’ and is read-only.
•User Mapping values must be the attribute within Active Directory to map to the name in AT&T GSMS User field. Administrators must ensure that the name is accurate.