Authenticator Setup
The network access server that will make the Authenticator API call will need to be set up to communicate with the Authenticator server. This will require working with your IT security teams to enable.
Considerations:
•Protocols
•Firewall rule changes
•New UDP flows that previously did not exist.
Authenticator API Flows
|
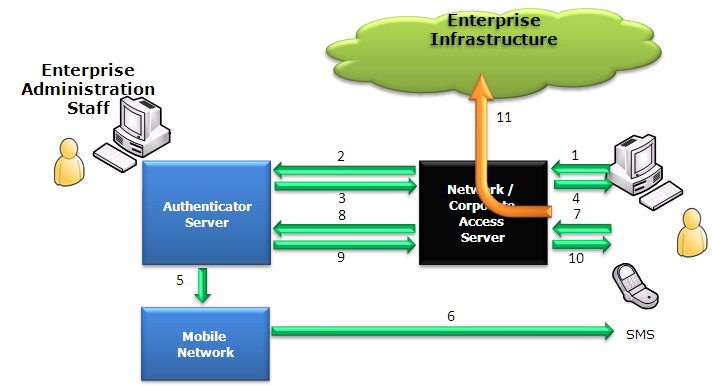
Steps
1.User logs onto their corporate network.
2.The network / corporate access server sends a request to the Authentication server: GenerateOTP Request (HTTP)
3.Authentication server responds to network access server with GenerateOTP Response (HTTP), this is used to store the session that will be challenged in step 7& 8.
4.Network / corporate access server then prompts the user for a One-Time Password.
5.& 6. In parallel to 3 & 4, the Authentication server sends an SMS towards the network's SMSC, which in turn delivers the SMS message to the user.
6.User types the password into the prompt.
7.Network / corporate access server sends ChallengeOTP Request (HTTP) to the Authentication server.
8.Authentication server validates request and responds to either network / corporate access server with 'REJECTED' or 'MATCHED'.
9.User is informed whether access is granted or not.
10. Network / corporate access server will as appropriate set up the relevant access to the corporate network.
Authenticator HTTP API Access
HTTP Access is the simplest way to connect your NAS to the Authenticator server if your NAS supports a HTTP interface for OTP generation and challenging.
Your HTTP access is on standard port 443 for HTTPS.
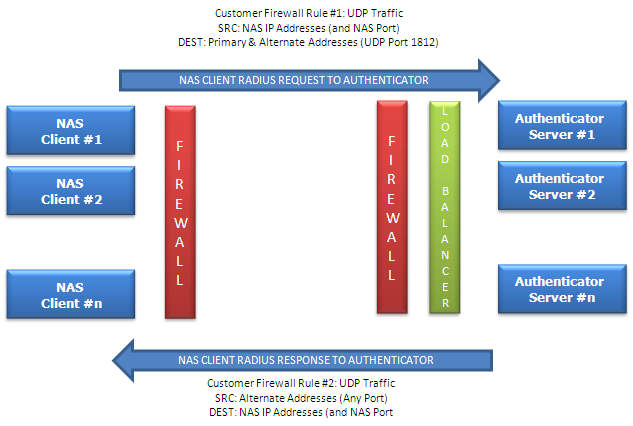
Authenticator RADIUS API Access
Your NAS will be required to send requests to the Authenticator server over UDP to port 1812.
The return path will also need to be configured to allow the response from the Authenticator server to be send to your NAS.
|